How to Clean Your Air Fryer: Step-by-Step Guide for Easy Maintenance

Regular and thorough cleaning is absolutely crucial for maintaining your air fryer's performance, preventing unpleasant smells, and avoiding common issues like smoking during cooking, especially with fattier foods. While it might seem like a chore, cleaning an air fryer is usually quick and easy, particularly if you get into the habit of doing a basic cleanup after each use. This step-by-step guide will walk you through the best practices for cleaning your air fryer effectively, from quick daily maintenance to tackling deeper messes in the main unit and on the heating element.
Why Cleaning Your Air Fryer Matters
Keeping your air fryer clean isn't just about hygiene; it directly impacts your cooking results and the lifespan of your appliance:
- Prevents Smoke & Odors: Burned-on grease, dripping fat, and leftover food particles are the primary causes of smoke and unpleasant smells that can affect the taste of your food during cooking (see troubleshooting guide section on smoking).
- Maintains Performance: A clean heating element and unobstructed airflow ensure consistent cooking temperatures and efficient air circulation, which are vital for achieving that desirable crispy texture (see air frying tips for crisping).
- Extends Appliance Lifespan: Preventing the buildup of grease and food residue helps protect the non-stick coating on your basket and tray, and can prevent damage to the heating element and fan over time.
- Ensures Food Safety: A clean cooking environment is essential for hygienic food preparation.
Basic Daily/After Use Cleaning (Basket and Tray)
This level of cleaning should ideally be done after *every* time you cook in your air fryer:
- Unplug and Cool: Safety first! Always unplug your air fryer from the wall outlet and let the basket, tray, and main unit cool down completely before attempting to clean them. Never immerse the main electronic unit in water.
- Remove Basket & Tray: Carefully remove the basket and the tray/crisper plate from the air fryer drawer assembly.
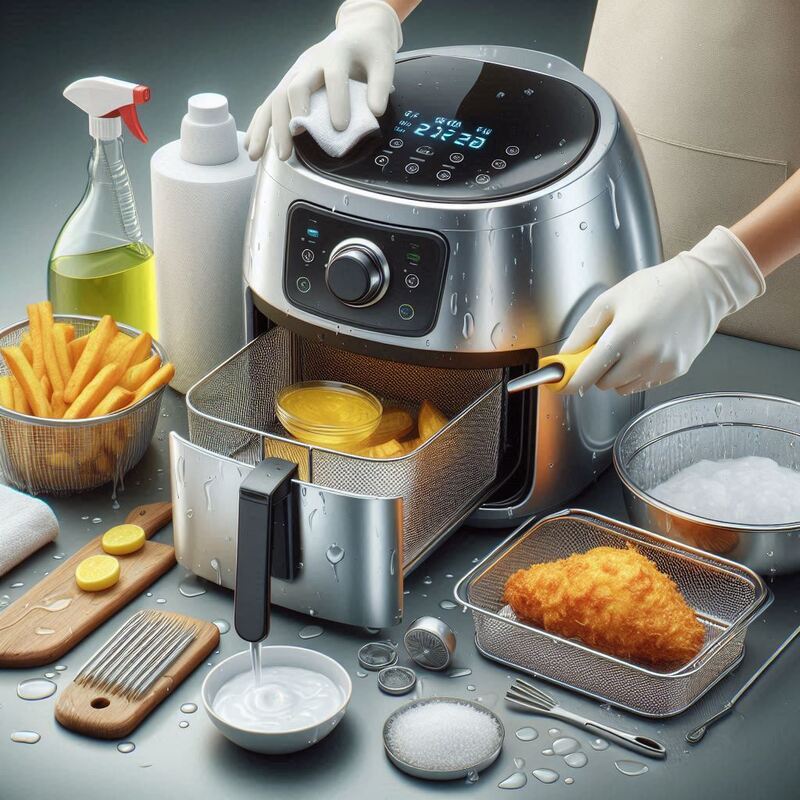
- Wash with Soap and Water: Most air fryer baskets and trays have a non-stick coating. Wash them with warm water and a small amount of standard dish soap. Use a non-abrasive sponge or brush (like a soft-bristled kitchen brush or a brush specifically designed for non-stick cookware) to avoid damaging the coating. **Absolutely avoid** abrasive cleaning pads like steel wool, rough scouring pads, or harsh chemical cleaners.
- For Stuck-On Food: If food is stuck or burned onto the basket or tray, fill the basket with warm, soapy water and let it soak for 10-15 minutes (or longer if needed) before washing. This will usually loosen stuck-on residue.
- Rinse & Dry Thoroughly: Rinse the basket and tray thoroughly with clean water to remove all soap residue. Dry them completely with a soft cloth or paper towel before putting them back into the air fryer unit. Storing components while damp can lead to odors or damage.
- Wipe Down Exterior: Use a damp (not wet) cloth or sponge to quickly wipe down the outside of the air fryer unit and the control panel, removing any splatters or fingerprints.
Check your user manual – many air fryer baskets and trays are marked as dishwasher safe. While convenient, hand washing is often recommended to preserve the non-stick coating's effectiveness and lifespan over time.
Deep Cleaning the Interior Cavity & Heating Element (Periodically)
Over time, grease splatters and fine food particles can accumulate inside the main air fryer unit cavity and on the heating element at the top. This needs to be cleaned periodically to maintain performance and prevent smoking. Always ensure the unit is unplugged and completely cold before doing this!
- Inspect Interior: Look inside the main air fryer cavity where the basket sits for any grease splatters, crumbs, or residue on the walls and the heating element cover/element itself.
- Wipe Cavity Walls: Use a damp (not dripping wet) cloth or sponge with a little dish soap to carefully wipe down the interior walls of the cavity. Avoid getting water into any electrical components. Wipe again with a clean damp cloth to rinse off soap residue, then dry thoroughly.
- Clean Heating Element: The heating element is usually located at the top interior of the unit. It's often protected by a metal cover. With the unit fully cooled and unplugged, use a non-abrasive sponge or brush (like a toothbrush, a specialized cleaning brush with a handle, or a soft-bristled bottle brush) to gently scrub away any food residue or grease stuck to the heating element cover or the element itself. Be very careful not to apply excessive pressure or damage the element.
- Tackling Stubborn Spots: For stubborn, baked-on grease spots inside the cavity or on the heating element cover, you can try creating a paste of baking soda and water. Apply the paste to the cooled spot, let it sit for a few minutes to loosen the residue, then gently scrub with a non-abrasive tool. Wipe clean with a damp cloth and dry thoroughly.
- Ensure Thorough Drying: It is crucial that the interior cavity and heating element area are completely dry before plugging the air fryer back into the wall outlet or using it again. You can leave the drawer open for a while to air dry or gently wipe with a dry cloth.
This deeper cleaning might be needed less frequently than daily cleaning, perhaps every few uses depending on what you cook.
Cleaning Different Air Fryer Types
While the core principles are the same, specific cleaning steps vary slightly depending on your air fryer's configuration:
- Basket-Style Air Fryers: Your primary focus is on the removable basket and tray/crisper plate, plus the cavity underneath the basket where grease collects in the drawer.
- Air Fryer Oven-Style or Toaster Oven Combos: These models often have racks, a pull-out crumb tray at the bottom, and a glass door. Pull out and clean the crumb tray regularly (ideally after every use). Wash racks and baking trays like you would standard oven racks and pans. Wipe down the interior walls and the glass door. The heating elements are usually visible at the top and bottom and can be gently wiped when completely cooled.
- Multi-Cookers (with Air Fry Lid): Clean the main cooking pot (usually easy, like an Instant Pot liner), the air fry basket/rack accessory, and the air fry lid itself. The lid often requires careful wiping down, being extra cautious around the heating element and fan components to avoid getting electronics wet. Always refer to your model's specific user manual for lid cleaning instructions.
Tips for Making Air Fryer Cleanup Easier
Prevention and smart techniques can make the cleaning process less of a hassle:
- Use Parchment Liners (Perforated): Air fryer parchment liners with holes are designed to fit the basket and catch drips, crumbs, and grease, making cleanup much faster. Ensure they are weighted down by food while cooking and don't cover the entire bottom of the basket or block airflow holes (see air fryer accessories guide or see tip on liners).
- Add Water to the Drawer for Fatty Foods: For foods prone to dripping a lot of fat or grease (like chicken wings, bacon, or cheese), adding a small amount of water (a few tablespoons) to the bottom of the outer collection drawer (underneath the air fryer basket) can help cool the dripping fat. This prevents it from smoking and baking onto the drawer, making that part much easier to clean (helps prevent smoking too!).
- Lightly Oil Food: Tossing or spraying food lightly with oil not only helps with crisping and flavor but can also help prevent it from sticking severely to the air fryer basket or tray. Use a good quality oil mister filled with your preferred cooking oil (see accessories or see tip on oil).
- Clean While Still Warm (with Caution!): Once the unit is unplugged and safe to touch (warm, but not hot enough to burn you), it can sometimes be easier to wipe away grease and residue before it fully hardens and becomes baked on. Always prioritize safety – if it's too hot, wait longer!
- Soak Immediately: If food is really stuck, start soaking the basket and tray in warm, soapy water as soon as it's safe to handle after cooking.
Dealing with Lingering Odors
Sometimes cooking strong-smelling foods (like fish) or residual baked-on grease can leave an unpleasant odor in your air fryer. After cleaning, you can try these methods to help neutralize smells:
- Place a few lemon slices in the air fryer basket and air fry for 5-10 minutes at 350°F (175°C). The lemon steam can help freshen the cavity.
- Place a small oven-safe bowl filled with a few tablespoons of white vinegar in the air fryer basket and air fry for 5-10 minutes at a low temperature like 300°F (150°C). Ensure good ventilation while doing this, as the vinegar smell can be strong initially.
- Leave the air fryer drawer slightly open for a while after it's cooled completely to allow for air circulation.
Conclusion: Keep it Clean for the Best Air Frying Experience
Making air fryer cleaning a regular and simple habit will ensure your appliance stays in top condition, continues to deliver delicious, smoke-free results, and lasts for years to come. A few minutes of basic cleanup after each use saves you time and hassle from stubborn baked-on messes down the road! Prioritize cooling and gentle cleaning to protect your investment.
