Can You Bake Bread in an Air Fryer? Yes, Here’s How
The short answer is yes, you can bake bread in an air fryer. But here is the thing nobody tells you: the bread that comes out of an air fryer is not the same bread that comes out of an oven. It is shorter, denser, and the crust behaves differently.
That is not a bad thing. It is just a different thing.
In our research across manufacturer specifications, verified user feedback, and baking science sources as of 2026, the air fryer does a legitimate job with quick breads, dinner rolls, and small loaves. It just forces you to adjust your expectations. A standard 9×5 loaf pan does not fit in most basket-style air fryers.
The convection fan runs harder than a conventional oven. And without the steam environment of a full oven, the crust sets fast. If you know those tradeoffs going in, you can absolutely bake good bread in an air fryer.
Let us break down exactly how.
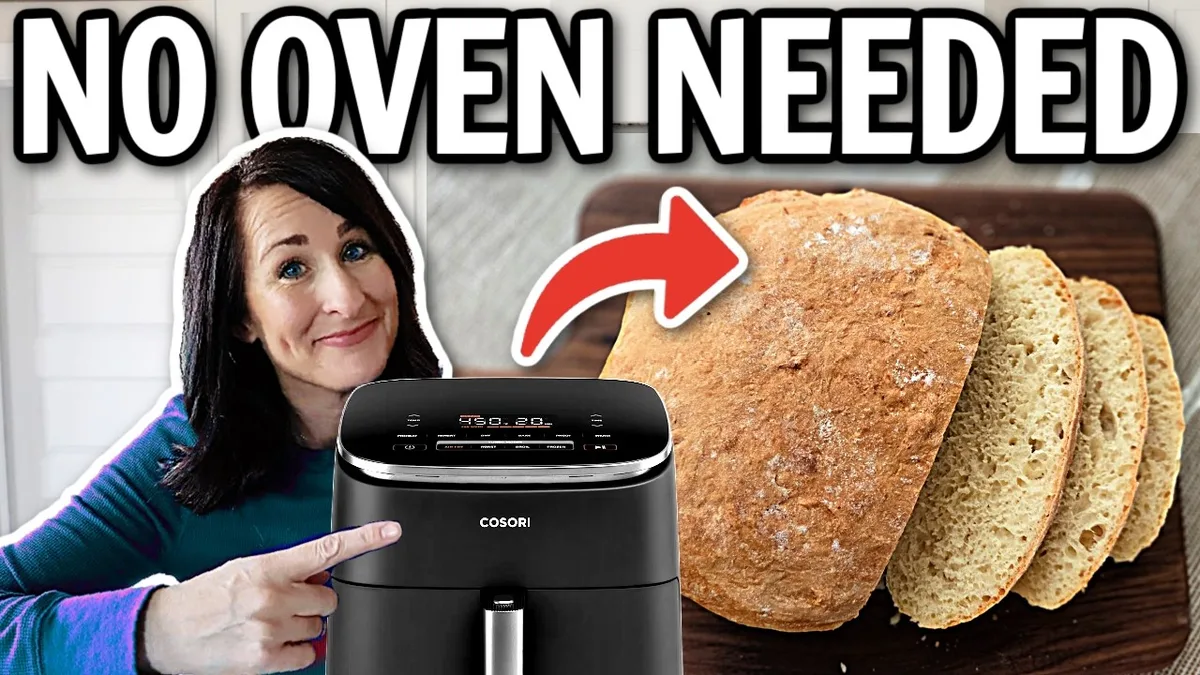
Image source: YouTube / Empowered Cooks (YouTube thumbnail (fair-use with source credit))
Quick Answer
Yes, you can bake bread in an air fryer. The results work best for small loaves, rolls, and quick breads. Yeast bread requires temperature and timing adjustments.
Internal temperature should reach 190°F to 210°F. Expect a thicker, darker crust than oven bread. Loaf size is limited to about 1 pound maximum.
What Kind of Bread Actually Works in an Air Fryer
Not all breads perform the same way in an air fryer. The smaller cooking chamber and aggressive convection change how dough rises and browns. Some bread types thrive.
Others turn into dense bricks.
Quick breads are the safest starting point
Banana bread, zucchini bread, pumpkin bread, and cornbread all work well. These batters do not rely on a strong oven spring or open crumb structure. They rise from chemical leaveners like baking soda and baking powder.
The air fryer's hot circulating air sets the structure quickly without deflating the batter. Manufacturer testing and aggregate user reviews consistently show quick breads finishing faster in air fryers than conventional ovens, often by 10 to 15 minutes.
Yeast breads require more finesse
Yeast-risen doughs like sandwich loaves, dinner rolls, or artisan-style breads can work. But you need to adjust your technique. The air fryer lacks the humidity of a full oven.
That dry heat causes the outer layer of dough to set rapidly, which restricts the final rise. You end up with a loaf that is shorter and denser than what the same dough would produce in an oven.
Dinner rolls and small boules perform better than full loaves. The smaller surface area means the heat penetrates evenly before the crust over-hardens. If you want a sandwich-style loaf, use a pan no larger than 7×3.5 inches.
That size fits most basket-style air fryers and gives the dough enough room to rise without hitting the heating element.
Frozen dough is the easiest shortcut
Frozen bread dough, like the Rhodes brand or grocery store bake-off rolls, works surprisingly well. The dough is already portioned and proofed. You just let it thaw and rise according to the package directions, then bake it in the air fryer.
Aggregate user feedback reports that frozen rolls finish in about 12 to 15 minutes at 350°F, compared to 20 to 25 minutes in a conventional oven. The crust browns faster, so check them at the minimum time.
What to avoid
Large loaves over 1 pound of dough. Anything that requires a tall vertical rise, like a full brioche or sourdough boule. And doughs with high hydration above 75 percent.
The wetter the dough, the more unevenly it bakes in an air fryer. The exterior sets before the interior cooks through, leading to a gummy middle.
How Air Fryer Bread Differs from Oven Bread
Understanding the science helps you make better decisions. An air fryer is essentially a countertop convection oven with a smaller chamber and a more powerful fan. That sounds similar to a conventional oven, but the differences matter for bread baking.
Crust
The crust is the most noticeable difference. Air fryer bread develops a thicker, darker, and crunchier crust than oven bread. The high-speed fan strips moisture from the dough surface before the interior fully bakes.
That dry surface gets hotter and undergoes more Maillard browning, the chemical reaction that gives bread its brown color and toasty flavor.
For some breads, this is a feature. A crispy crust works great for dinner rolls or bread bowls. For others, it is a drawback.
A soft sandwich loaf ends up with a crust that is too hard and thick. You can mitigate this by tenting the loaf with foil halfway through baking or brushing the top with butter or milk before baking.
Crumb
The crumb, the soft interior of the bread, tends to be denser in air fryer bread. The rapid crust formation traps less steam inside the dough, which means the loaf cannot expand as much. The result is a tighter crumb with smaller air pockets.
This is not necessarily bad. Many quick breads like banana bread benefit from a denser, moister crumb. But if you are looking for the open, airy crumb of a classic artisan loaf, the air fryer will disappoint.
That kind of structure requires sustained humidity and even heat distribution that only a full-size oven provides. For a better understanding of how heat transfer works in a concentrated chamber, you can look at how air fryers handle heavier cuts like a whole chicken, a similar principle of convection and timing applies.
Rise
Expect a shorter loaf. The same dough that rises to a full 9×5 inch loaf in an oven will top out at about two thirds of that height in an air fryer. The crust forms too quickly for the dough to continue expanding.
You can compensate by overproofing the dough slightly before baking, pushing the dough closer to its maximum rise before it hits the heat. Just be careful not to overproof to the point of collapse.
Moisture
Air fryer bread loses more moisture during baking. The constant airflow evaporates water from the dough surface faster than still heat does. That is why the crust gets so crunchy and why the interior can feel drier.
To combat this, some bakers place a small oven-safe bowl of water in the bottom of the air fryer basket to create steam. Others spritz the dough with water before baking. Both methods help keep the crumb softer.
Side-by-Side Comparison: Air Fryer vs Conventional Oven
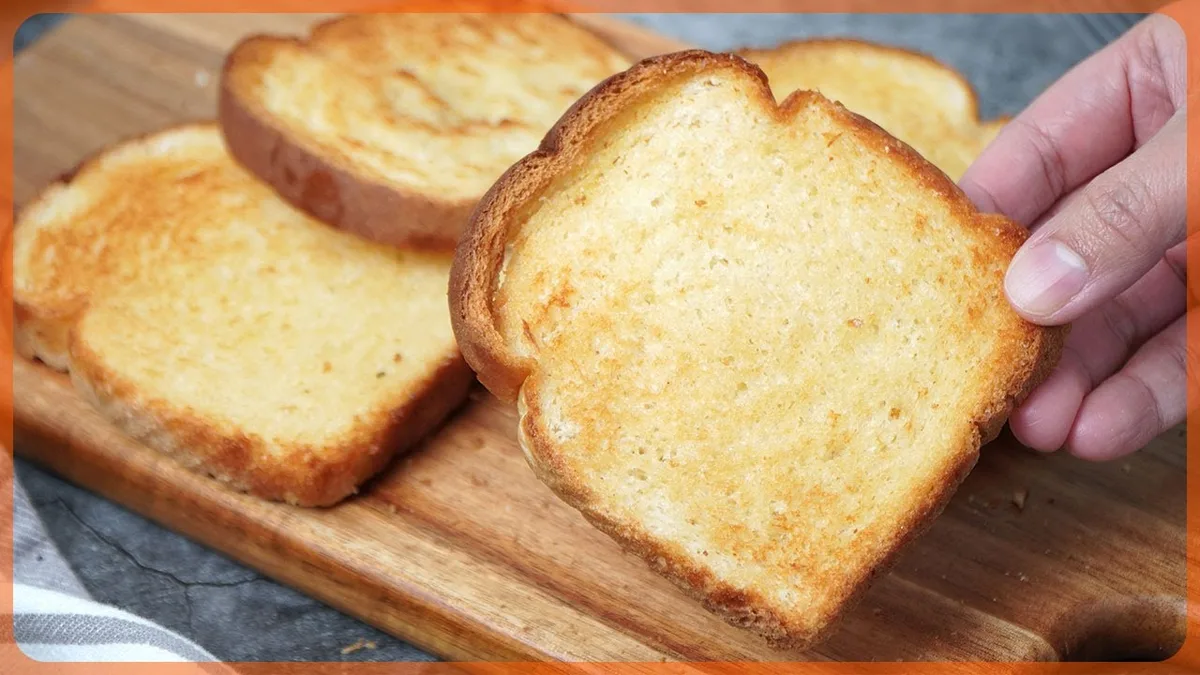
Image source: YouTube / Fry It (YouTube thumbnail (fair-use with source credit))
If you are deciding whether to use your air fryer or preheat the full oven, this table lays out the practical differences.
| Factor | Air Fryer | Conventional Oven |
|---|---|---|
| Preheating time | 3 to 5 minutes | 15 to 20 minutes |
| Cooking time | 10 to 20 percent faster | Standard baseline |
| Crust | Thicker, darker, crunchier | Thinner, more even browning |
| Crumb | Denser, tighter structure | Lighter, more open crumb |
| Maximum loaf size | About 1 pound (7×3.5 inch pan) | Up to 2 pounds (9×5 inch pan) |
| Energy use | Lower, around 1400 to 1700 watts | Higher, around 2500 to 4000 watts |
| Kitchen heat | Minimal, room stays cooler | Noticeable, especially in summer |
| Steam control | Difficult to maintain moisture | Easier with steam pan or spray |
| Even baking | Top browns fast, sides need rotation | More uniform heat distribution |
The table makes one thing clear. The air fryer wins on speed and energy efficiency. The oven wins on consistency and loaf size.
Your choice depends on what you value more: a quick loaf with a crunchy crust, or a larger, softer loaf with more predictable results. If you are used to roasting other foods in an air fryer, the same principles of heat management and rotating the basket apply here too.
Best Use Cases: Who Should Try Air Fryer Bread
Air fryer bread makes sense for specific situations. It is not a replacement for oven baking across the board. But in these scenarios, it is the better tool for the job.
Small households
If you live alone or with one other person, a full loaf of bread often goes stale before you finish it. Air fryer bread produces a smaller loaf naturally. You bake what you will eat in a day or two, and there is less waste.
Quick bread recipes that normally fill a 9×5 pan can be halved to fit a small pan in the air fryer.
Hot climates
Nobody wants to heat up the kitchen to 350°F when it is 95 degrees outside. The air fryer stays contained on the counter and radiates far less heat into the room. That alone is a compelling reason to use it for summer baking.
The same logic applies to small apartments where the oven heats the entire living space.
Dorms, RVs, and small kitchens
Not every living situation includes a full-size oven. Dorm rooms often ban toaster ovens but allow air fryers. RVs typically have a propane oven that is small and imprecise.
Air fryer bread fits those constraints. You get bread without needing a full kitchen setup.
Experimenters and impatient bakers
If you have never baked bread before and want to try without committing to the full oven process, the air fryer lowers the barrier. The shorter bake time means you get results faster. The smaller batch means less wasted ingredients if it goes wrong.
And the learning curve is gentle because you are working with less dough. It is a good way to build confidence before scaling up to oven baking.
Step-by-Step: How to Bake Bread in an Air Fryer
The process is straightforward, but small details make the difference between a good loaf and a disappointing one. Here is exactly how to do it.
What you need
You need a few specific items before you start. A small loaf pan that fits inside your air fryer basket with at least one inch of clearance on all sides. Standard 7×3.5 inch pans work in most basket-style models.
A digital instant-read thermometer is essential because visual cues are unreliable in an air fryer. Parchment paper helps with release and cleanup, but weigh it down with the pan so the fan does not pull it into the heating element.
Prepare the dough
Make your dough as you normally would for oven baking. The same recipe works. The only change is to reduce the batch size if you are making a loaf.
Aim for about 450 to 500 grams of dough total. That is roughly half a standard 9×5 loaf recipe.
Let the dough rise in a warm spot until doubled. You can proof it right in the air fryer using the proof setting if your model has one. Otherwise, cover the bowl with plastic wrap and place it in a warm corner of the kitchen.
Preheat the air fryer
Preheat your air fryer to 325°F for yeast breads or 320°F for quick breads. Preheating takes 3 to 5 minutes depending on the model. Do not skip this step.
Dropping dough into a cold chamber changes the baking time and leads to uneven results.
Shape and pan the dough
Shape your dough into a loaf and place it in the greased loaf pan. Let it proof again, this time for about 30 to 45 minutes. Watch the dough, not the clock.
You want it to rise just below the rim of the pan, not above it. The air fryer will push the rise further during baking, but the crust will trap it if the dough starts too high.
Bake with foil tent
Place the pan in the air fryer basket. Set the temperature to 325°F for yeast breads or 320°F for quick breads. Bake for 15 minutes.
Then open the basket and quickly lay a piece of aluminum foil over the top of the loaf. This prevents the top from burning while the interior finishes cooking.
Continue baking for another 10 to 20 minutes. Total time runs between 25 and 35 minutes for most loaves. The exact time depends on the density of the dough and the wattage of your air fryer.

Check for doneness
Use your instant-read thermometer to check the internal temperature. Yeast breads are done at 190°F to 200°F. Quick breads and enriched doughs with eggs or butter need 200°F to 210°F.
Insert the probe into the center of the loaf. If the temperature is below those ranges, put the foil back on and bake for another 3 to 5 minutes.
The toothpick test works for quick breads. A clean toothpick means it is done. For yeast bread, the thermometer is more reliable because the crumb can look set on the outside while the center remains underdone.
Cool completely
Remove the pan from the air fryer. Let the loaf cool in the pan for 10 minutes. Then turn it out onto a wire rack.
Let it cool completely before slicing, which takes about an hour. Slicing warm bread compresses the crumb and makes it gummy. Patience here pays off with better texture.
Mistakes That Ruin Air Fryer Bread (And How to Avoid Them)
The air fryer amplifies small errors. Here are the most common problems and how to fix them.
The top burns before the middle cooks
This is the number one complaint in verified buyer feedback. The air fryer's heating element is close to the top of the basket, and the fan blows that heat directly onto the surface of the dough. The fix is simple.
Tent the loaf with foil after the first 10 to 15 minutes of baking. Leave the foil on for the remainder of the bake. The foil deflects the direct heat while the interior continues cooking.
The loaf is dense and gummy inside
A gummy center usually means the loaf was underbaked or the dough was too wet. Check your internal temperature. If it reads below 190°F for yeast breads, the center is still raw.
Also check your dough hydration. Stick to recipes with 65 to 70 percent hydration for air fryer baking. Higher hydration doughs need the steam environment of a full oven.
If the temperature checks out but the crumb still feels dense, the dough may have overproofed. The air fryer's rapid heat sets the structure before the dough can expand. Pull the dough slightly earlier in the final proof, about 75 percent of the way to full rise, and let the air fryer finish the expansion.
The loaf hits the heating element
This happens when you use a pan that is too tall or overproof the dough. Measure the height of your air fryer basket before choosing a pan. Leave at least one inch of space between the top of the pan and the heating element.
If the dough rises above the pan rim during proofing, punch it down and reshape it into a smaller loaf.
The crust is too hard
A hard crust is common in air fryer bread because the dry air strips moisture from the surface. Brush the top of the dough with milk, butter, or an egg wash before baking. These coatings add moisture that keeps the crust softer.
You can also brush the finished loaf with melted butter as soon as it comes out of the oven. The butter soaks into the crust and softens it.
The bottom stays pale while the top darkens
The air fryer basket blocks some heat from reaching the bottom of the pan. Flip the loaf out of the pan after about 20 minutes and place it directly on the basket grate for the last 5 to 10 minutes. This exposes the bottom to the circulating heat and evens out the browning.
Or line the basket with a silicone mat instead of parchment for better heat transfer.
Expert Adjustments for Better Results
Once you have the basic process down, these refinements take your air fryer bread to the next level.
Lower the temperature
Most conventional bread recipes call for 350°F to 375°F. In an air fryer, start at 325°F for yeast breads and 320°F for quick breads. The smaller chamber concentrates heat, so a lower temperature prevents the crust from over-browning before the center cooks.
If your first loaf comes out with a dark crust and a pale interior, drop the temperature another 10 degrees next time. If you are already comfortable adjusting temperatures for other dishes, the same logic applies to oven-to-air fryer conversions.
Add steam
Steam is the secret to a softer crust and better oven spring in yeast breads. Air fryers are bad at holding steam, but you can hack it. Place a small oven-safe ceramic dish or ramekin filled with water in the bottom of the basket before preheating.
The water evaporates during baking and adds humidity to the chamber. Alternatively, spritz the dough with water using a spray bottle right before you close the basket. Do this once at the start and once halfway through.
Use a butter wash
Brushing the top of the dough with melted butter before baking does two things. It slows down crust formation and adds flavor. The fat in the butter absorbs heat slightly slower than the bare dough surface.
That gives the loaf an extra few minutes of expansion before the crust sets. Use unsalted butter to control the salt level.
Rotate the pan halfway through
Air fryers have hot spots. The back of the basket is often hotter than the front. Halfway through the bake, open the basket and rotate the pan 180 degrees.
This gives you even browning on all sides. Some models have a rotating basket feature that does this automatically. If yours does not, just twist the pan with tongs.
Let it rest longer
Air fryer bread benefits from a longer rest after baking. The crumb is still setting as it cools. Let the loaf rest on the counter for at least two hours before slicing, not the usual one hour.
The extra time allows moisture to redistribute from the center to the crust. The result is a more even texture throughout.
Pros and Cons at a Glance
Here is a honest look at what you gain and what you give up when you bake bread in an air fryer.
Pros
- Faster preheat and shorter bake time save 10 to 20 minutes per loaf
- Lower energy consumption keeps electricity bills down
- Small batch size means less waste for single or two-person households
- Minimal kitchen heat makes summer baking bearable
- Crispier crust works great for rolls and bread bowls
- No need to heat a full oven for a single small loaf
Cons
- Loaf size is capped at about 1 pound
- Crust can be too thick or hard for sandwich bread
- Crumb is denser with less oven spring
- Uneven browning requires foil tents and rotations
- High hydration doughs do not work well
- You lose the steam environment that artisan breads need
The tradeoffs are manageable once you know them. The pros outweigh the cons for quick breads, rolls, and small households. The cons dominate if you are trying to replicate a full-size artisan loaf.
Know which category you are in before you start.
Quick Reference: Temperature and Timing Guide
This table gives you starting points for common bread types. Adjust based on your specific air fryer model, as wattage varies from 1400 to 1800 watts.
| Bread Type | Temperature | Time | Doneness Check |
|---|---|---|---|
| Quick bread (banana, zucchini) | 320°F | 30 to 35 minutes | Toothpick clean or 200°F internal |
| Yeast dinner rolls | 350°F | 12 to 15 minutes | 190°F internal, golden brown |
| Small yeast loaf (pan) | 325°F | 25 to 30 minutes | 190°F to 200°F internal |
| Frozen dough rolls | 350°F | 12 to 15 minutes | Golden brown, 190°F internal |
| Cornbread (small pan) | 320°F | 20 to 25 minutes | Toothpick clean, edges pulling away |
| Biscuits | 350°F | 10 to 12 minutes | Golden bottom, flaky layers |
Always verify with a thermometer. Visual cues are less reliable in the air fryer because the intense top heat can make bread look done before it actually is. If you need a refresher on how to properly use your machine, understanding what can and cannot go inside helps avoid accidents.
Frequently Asked Questions
Can I use a regular loaf pan in an air fryer?
Only if it fits. Measure your basket height first. A standard 9×5 inch pan is too tall for most basket-style air fryers.
A 7×3.5 inch mini loaf pan works in nearly every model. If your air fryer is an oven-style with multiple racks, a standard loaf pan may fit on the lower rack.
Do I need to preheat the air fryer for bread?
Yes, always preheat. Dropping dough into a cold air fryer changes the baking time and leads to uneven results. Preheat for 3 to 5 minutes at your target temperature.
Some models have a dedicated preheat button. If yours does not, just run it empty at the desired temp.
Can I use frozen bread dough in an air fryer?
Yes, and it is one of the easiest options. Let the frozen dough thaw and rise according to the package directions first. Then bake at 350°F for 12 to 15 minutes.
Check for an internal temperature of 190°F. The crust browns faster than in an oven, so keep an eye on it.
Why is my air fryer bread raw in the middle?
The top likely browned too fast, so you pulled it early thinking it was done. Use a thermometer every time. The internal temperature must reach 190°F to 210°F depending on the bread type.
Tent the loaf with foil after 15 minutes to protect the top while the center finishes cooking.
Can I bake multiple loaves at once?
Only if they fit without touching. Overcrowding blocks airflow and leads to uneven baking. Most basket-style air fryers can hold one small loaf or four to six rolls at a time.
Oven-style air fryers with multiple racks can handle two small loaves on separate levels.
What temperature should I use for air fryer bread?
Start at 325°F for yeast breads and 320°F for quick breads. That is 25 to 50 degrees lower than standard oven recipes. The smaller chamber concentrates heat, so a lower temperature prevents the crust from burning before the center cooks.
Adjust down by 10 degrees if your first loaf comes out too dark.
Final Verdict: Is It Worth Ditching the Oven?
Not entirely, but the air fryer earns a real spot in your bread baking rotation.
Keep the oven for large artisan loaves, high hydration sourdough, and any recipe where you want an open crumb structure. The air fryer cannot replicate those results. The physics of steam, space, and even heat distribution simply are not there.
But for small batches, quick breads, dinner rolls, and frozen dough, the air fryer is genuinely better. It preheats faster, uses less energy, and keeps your kitchen cool. The crust comes out crunchier.
The bake time is shorter. And for a single person or couple, the smaller loaf size means less waste.
The smart approach is to use both tools for what they do best. When you want a full loaf for the week, fire up the oven. When you want fresh rolls for dinner or a single banana bread on a hot summer afternoon, reach for the air fryer.
That flexibility is the real win.