Can You Cook Raw Chicken Breast in an Air Fryer?
It's a question we hear all the time: can you cook raw chicken breast in an air fryer? The short answer is yes, absolutely. But the real question is how to do it safely and well.
Get it wrong, and you're either dealing with dry, rubbery meat or worse, undercooked chicken that's a food safety risk. That's the part nobody wants to think about.
The USDA sets the safe internal temperature for poultry at 165°F. That's not a suggestion, it's the standard. An air fryer circulates hot air at high speed, which cooks chicken faster than a conventional oven.
But speed doesn't guarantee safety. You need the right technique. As of 2026, air fryers are more popular than ever, but the basic rules of food safety haven't changed.
Let's start with why getting this right really matters.
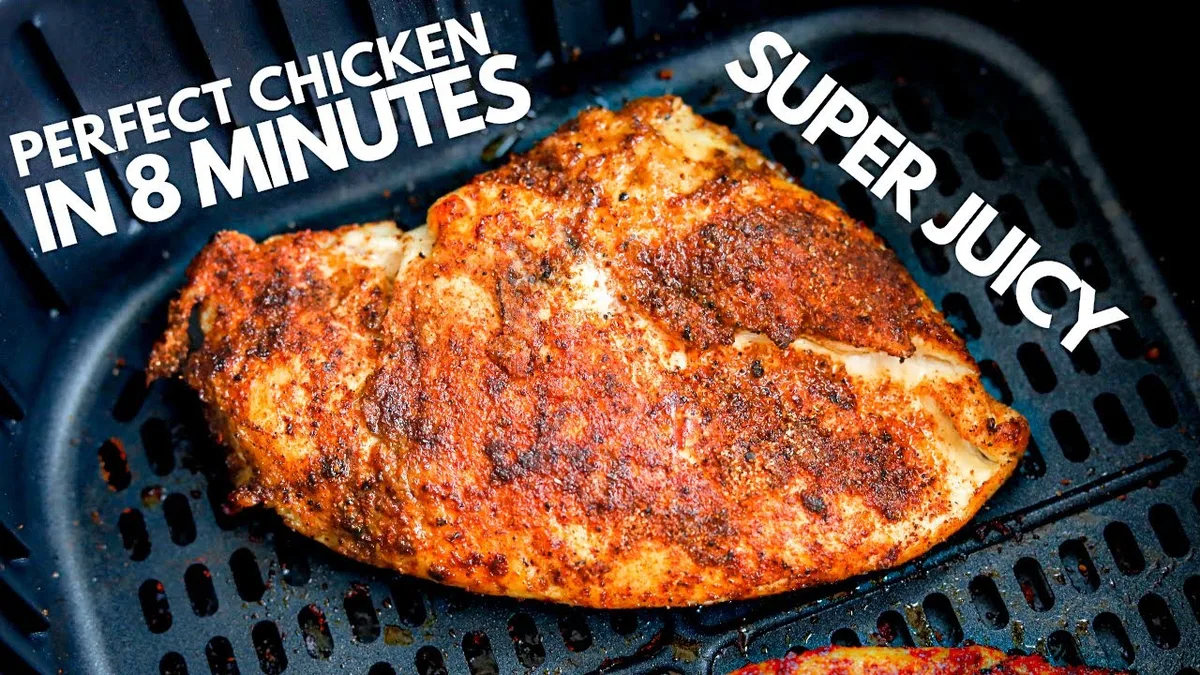
Image source: YouTube / Joe Duff, The Diet Chef (YouTube thumbnail (fair-use with source credit))
Why Getting This Right Matters (Food Safety First)
Salmonella and Campylobacter are the real threats here. These bacteria live in raw poultry, and they don't play nice. The USDA's Food Safety and Inspection Service provides clear guidelines for handling poultry.
The "danger zone" for bacterial growth sits between 40°F and 140°F. Chicken should not stay in that zone for more than two hours.
An air fryer cooks fast, but fast doesn't automatically mean safe. If the basket is overcrowded, some pieces may not reach the proper temperature. The same thing happens if you skip the flip halfway through.
Uneven cooking is the most common mistake we see in our research.
Cross-contamination is another big one. Keep raw chicken separate from everything else in your kitchen. Use a dedicated cutting board.
Wash your hands with soap and warm water for at least 20 seconds after handling raw poultry. Don't use the same tongs for raw and cooked chicken. These steps feel basic, but they're the ones people forget when they're in a hurry.
If you're new to cooking meat in one of these appliances, you might also want to check our guide on cooking larger cuts of meat. The principles are similar, but the timing changes significantly.
Quick Answer: Yes, You Can — Here's the Safe Way to Do It
Yes, you can cook raw chicken breast in an air fryer. Set it to 375°F. Cook for 12 to 18 minutes.
Flip halfway through. Always check the internal temperature. It must reach 165°F.
That's the short version. The rest of this article explains the details you need to get it right every time. No guesswork.
No dry chicken. No safety risks.
What Temperature Kills Bacteria? The Science of 165°F
The number 165°F comes from the USDA. At that temperature, salmonella is killed almost instantly. The bacteria die within seconds.
That's why it's the gold standard for poultry safety.
The air fryer's convection heat is efficient. It blasts hot air around the chicken, cooking it from the outside in. The exterior may look golden brown and done, but the thickest part of the breast might still be raw.
That's the trap. Color and texture are not reliable indicators. Only a meat thermometer gives you the truth.
The air fryer itself can reach temperatures up to 400°F or higher. But the internal temperature of the chicken is what matters. The outside can be 400°F while the middle is still 140°F.
That's still in the danger zone. You need to cook until the center hits 165°F.
If you're curious about how different temperatures affect other foods, our guide on optimal temperature settings covers the science behind convection cooking in more detail.
What Affects Cooking Time? Thickness, Frozen vs. Fresh, and Bone-In
Not all chicken breasts are created equal. The biggest variable is thickness. A thin breast that's half an inch thick cooks in about 10 minutes.
A thick breast that's an inch and a half can take 18 minutes or more. The difference is huge.
Here's a quick reference table for common scenarios:
| Chicken Type | Thickness | Temperature | Approximate Time | Flip? | Notes |
|---|---|---|---|---|---|
| Boneless, skinless (thin) | 1/2 inch | 375°F | 10–12 minutes | Yes | Check temp at 10 min |
| Boneless, skinless (standard) | 3/4–1 inch | 375°F | 12–15 minutes | Yes | Most common size |
| Boneless, skinless (thick) | 1–1.5 inches | 375°F | 15–18 minutes | Yes | May need extra time |
| Bone-in, skin-on | 1–1.5 inches | 375°F | 20–25 minutes | Yes | Higher internal fat keeps it moist |
| Frozen (boneless) | 3/4–1 inch | 375°F | 20–25 minutes | Yes | Thawed is better, but frozen works |
Frozen chicken takes roughly 50 percent longer than fresh. The outer layer thaws and cooks while the inside stays frozen. It's doable, but thawed chicken gives you more consistent results.
If you cook from frozen, add 5 to 10 minutes and check the temperature carefully.
Bone-in breasts take longer because the bone conducts heat differently. They also tend to stay more moist because the bone slows down cooking. If you're cooking a whole bird, you'll want to see our guide on cooking a whole bird for the right approach.
How to Cook Raw Chicken Breast in an Air Fryer: Step-by-Step
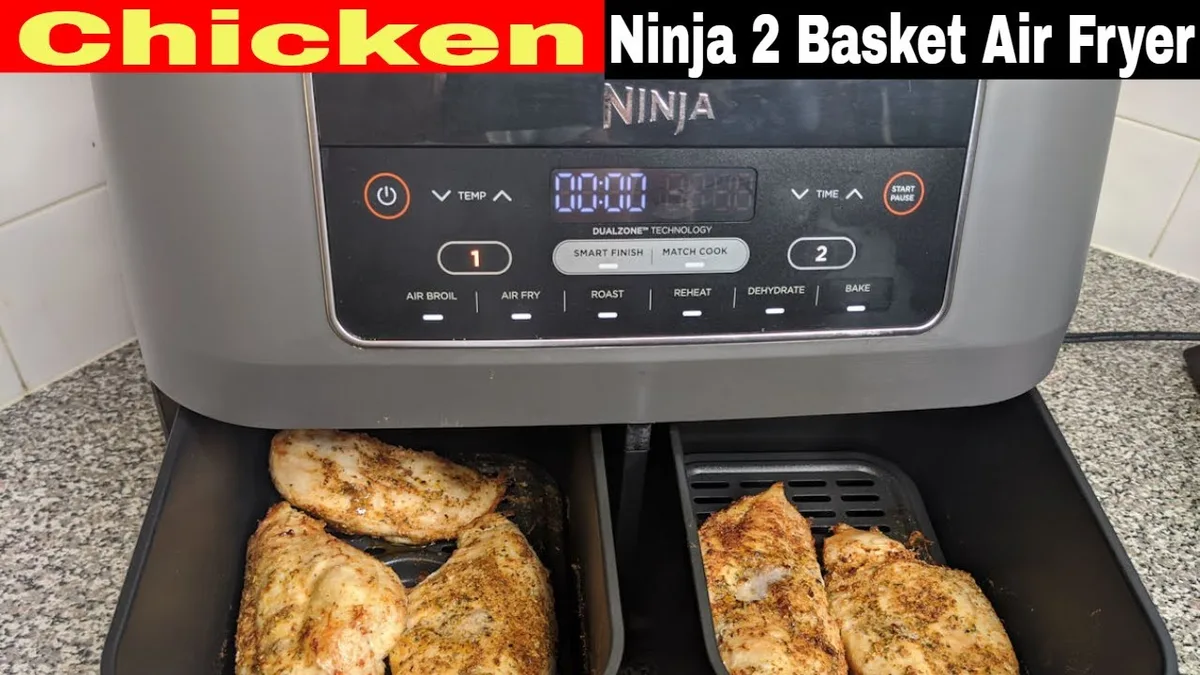
This is the process we recommend based on manufacturer specifications and aggregate user feedback. Follow these steps, and you'll get safe, juicy chicken every time.
Preheat the air fryer to 375°F. Most air fryers need 3 to 5 minutes to preheat. Don't skip this step. A cold air fryer extends cooking time and can lead to uneven results.
Pat the chicken dry with paper towels. Moisture on the surface creates steam instead of browning. Dry chicken gives you a better crust. It also helps seasoning stick.
Season the chicken. Keep it simple with salt, pepper, and garlic powder. Or use a marinade. If you marinate, pat the chicken dry before cooking. Wet marinades can cause splattering and uneven cooking.
Lightly spray or brush with oil. A thin coat of oil helps the chicken brown. Use a neutral oil with a high smoke point, like avocado or canola. Don't soak it. A light mist is enough.
Place the chicken in a single layer in the basket. Overcrowding traps steam and prevents browning. The hot air needs to circulate around each piece. If the chicken overlaps, cook in batches.
Cook for 8 minutes. Don't open the basket during this time. You want the heat to build up and start cooking the chicken.
Flip the chicken. Use tongs that haven't touched raw chicken. Flip each piece over. This ensures even cooking on both sides.
Cook for another 5 to 8 minutes. The exact time depends on thickness. Start checking at the 5 minute mark for thin breasts. Go to 8 minutes for thick ones.
Check the internal temperature with a meat thermometer. Insert the probe into the thickest part of the breast. Avoid touching bone. It must read 165°F minimum. If it's below, cook in 2 minute increments and check again.
Let the chicken rest for 5 minutes. Resting allows the juices to redistribute. Cutting into it immediately will cause the juices to run out, leaving you with dry meat. Place it on a cutting board and tent loosely with foil.
If you're planning a full meal, you might want to pair this with a perfect side dish. The timing works well because the chicken rests while the sides finish.
That's the process. It's simple once you've done it a couple of times. The key is the thermometer.
Don't trust the timer. Trust the thermometer.
The Most Common Mistakes — and How to Avoid Them
Even experienced cooks make errors with air fryer chicken. The good news is that most are easy to fix once you know what to look for. Here are the most frequent problems we see in aggregate user feedback.
Skipping the preheat. A cold air fryer extends cooking time by several minutes. That throws off all your timing. The exterior browns before the interior reaches 165°F.
Solution: always preheat for 3 to 5 minutes before adding the chicken.
Overcrowding the basket. This is the number one complaint we see. When pieces touch or overlap, the air can't circulate. The chicken steams instead of roasting.
You get pale, soggy meat. Solution: cook in a single layer with space between each piece. If you're cooking for a crowd, do two batches.
Not flipping halfway. Air fryers have hot spots. The side facing the heating element gets more direct heat. Without a flip, one side browns faster than the other.
Solution: flip the chicken at the halfway point. Use clean tongs.
Cutting into the chicken immediately. We get it, you're hungry. But cutting right out of the air fryer releases all the juices. The meat goes from juicy to dry in seconds.
Solution: let it rest for 5 minutes. That's a short wait for a much better result.
Using too much oil. A heavy coating of oil creates smoke and splatter. It also prevents the skin from crisping properly. Solution: a light spray or brush is enough.
You want a thin film, not a puddle.
If you're experimenting with different recipes, you might find our guide to air frying vegetables helpful for rounding out a complete meal. The same principles of heat circulation apply.
How to Keep Chicken Breast Juicy, Not Dry
Dry chicken breast is the enemy of a good meal. The air fryer can actually help you avoid it, but only if you handle the meat correctly. Here's what the research and manufacturer guidance suggest.
Brining helps. A simple saltwater brine for 30 minutes changes the protein structure. The chicken absorbs moisture and holds onto it during cooking. Use 1/4 cup of salt per 4 cups of water.
Submerge the chicken for 30 minutes, then rinse and pat dry.
Don't overcook it. This sounds obvious, but it's the most common cause of dry chicken. The USDA says 165°F is safe. Anything above 170°F starts to dry out the meat.
Pull the chicken at exactly 165°F. The carryover heat during resting will keep it there.
Pound to even thickness. A chicken breast that's thick on one end and thin on the other is a recipe for trouble. The thin part dries out while the thick part catches up. Solution: place the breast between two sheets of plastic wrap and pound it to an even 3/4 inch thickness.
This gives you uniform cooking.
Let it rest. We mentioned this above, but it's worth repeating. Resting allows the juices to redistribute throughout the meat. Cut too soon, and they pool on the cutting board.
Wait 5 minutes, and they stay inside the chicken.
Consider bone-in and skin-on. These cuts are more forgiving. The bone slows heat transfer, giving you a wider window before overcooking. The skin adds fat that keeps the meat moist.
If you're struggling with dry breasts, switch to bone-in for a few tries.
Air Fryer vs. Oven, Pan, and Grill: Which Method Wins?
Each cooking method has its strengths. The best choice depends on what you value most. Here's a breakdown of how the air fryer compares to the other common options.
| Method | Cooking Time | Moisture Retention | Crispiness | Cleanup | Best For |
|---|---|---|---|---|---|
| Air fryer | 12–18 minutes | Good | Excellent | Easy | Quick weeknight dinners |
| Oven (convection) | 20–25 minutes | Good | Good | Moderate | Batch cooking, larger quantities |
| Oven (conventional) | 25–30 minutes | Fair | Fair | Moderate | When you don't have an air fryer |
| Pan fry (skillet) | 8–12 minutes | Fair | Good | Moderate | Quick sear, smaller batches |
| Grill (outdoor) | 10–15 minutes | Fair | Excellent | Difficult | Summer cooking, smoky flavor |
Air fryer wins for speed and convenience. It preheats fast and cooks faster than an oven. The cleanup is simple. You don't need to heat up the whole kitchen.
For a single chicken breast or two, it's the most efficient option.
Oven wins for volume. If you're cooking for a family or meal prepping for the week, the oven handles more pieces at once. A convection oven gets close to air fryer results but takes longer. The trade-off is time versus capacity.
Pan fry wins for crust. A hot skillet with oil gives you a better sear. The direct contact creates a deeper browning. But you need to watch the temperature carefully.
It's easy to burn the outside while the inside stays raw.
Grill wins for flavor. Smoke and char add complexity that an air fryer can't replicate. But grill times are less predictable. Weather and heat consistency play a big role.
It's also the hardest to clean.
For most home cooks, the air fryer hits the sweet spot. It's fast, convenient, and produces reliably good results. If you're looking for a larger appliance that can handle more, our guide to roasting in an air fryer covers the bigger cuts.
Special Cases: Frozen Chicken, Meal Prep, and Bone-In Breasts
Cooking frozen chicken breast. It works, but it's not ideal. The main issue is uneven cooking. The outer layer thaws and starts cooking while the center stays frozen.
If you're in a hurry, here's how to do it safely.
Add 5 to 10 minutes to the cooking time. Keep the temperature at 375°F. Flip the chicken halfway through.
Check the temperature in the thickest part. It must reach 165°F. If you hit 160°F on one side but the center is still cold, cook in 2 minute increments.
A better approach is to thaw the chicken first. Place it in the refrigerator overnight. If you're short on time, use the cold water method.
Submerge the sealed chicken in cold water for 30 minutes. Change the water every 15 minutes.
Meal prep. The air fryer is great for cooking multiple breasts ahead of time. Cook them as described above. Let them cool completely.
Store in an airtight container in the refrigerator for up to 4 days.
Reheat in the air fryer at 350°F for 3 to 4 minutes. This brings back the texture better than a microwave. The microwave will make it rubbery.
The air fryer restores the crisp exterior.
Bone-in, skin-on breasts. These take longer to cook. Expect 20 to 25 minutes at 375°F. The bone acts as an insulator.
The skin crisps up beautifully. The meat stays moist because the fat renders slowly.
Check the temperature near the bone without touching it. The bone conducts heat, so a reading directly on the bone can be misleading. Insert the probe into the thickest part of the meat beside the bone.
You can also cook a whole chicken in the air fryer if you're feeding a group. The principles are the same, but the timing is different.
The One Tool You Shouldn't Skip: A Reliable Meat Thermometer
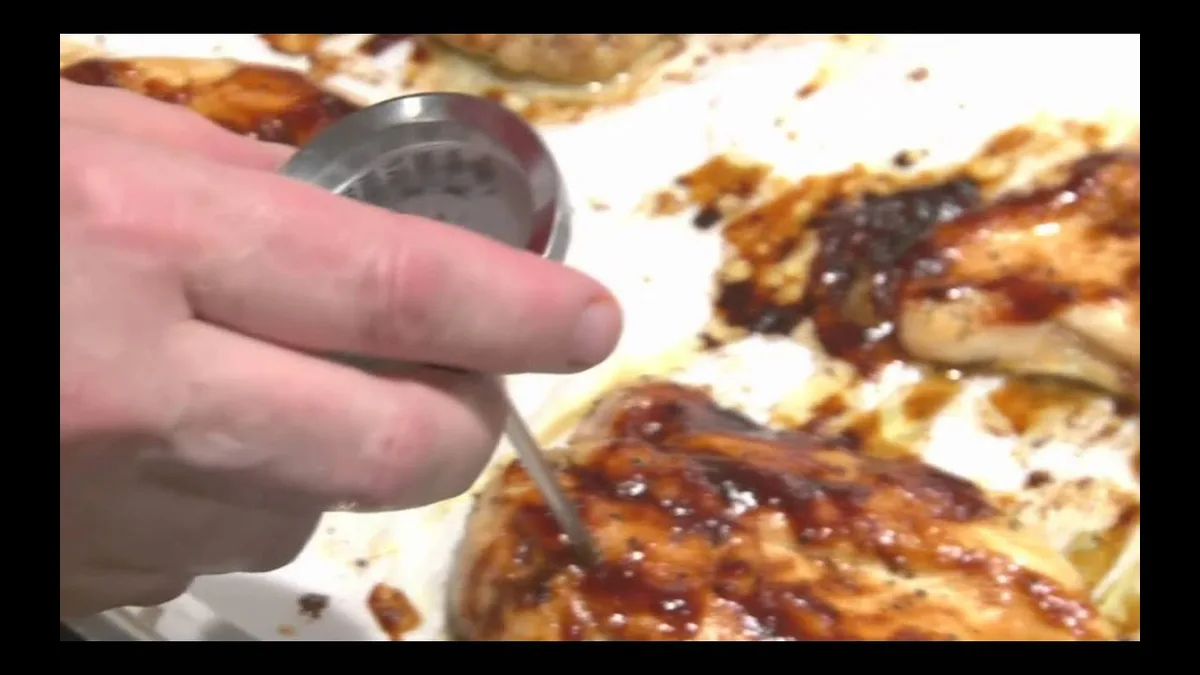
This is non-negotiable. You cannot reliably tell if chicken is done by looking at it. Color is not a reliable indicator.
The juices are not a reliable indicator. Only a thermometer gives you the truth.
What to look for. An instant-read digital thermometer is the best choice. It gives you a reading in 2 to 3 seconds. Look for one with a probe that's thin enough to insert easily.
A wide probe can tear the meat and give a false reading.
How to use it. Insert the probe into the thickest part of the breast. Avoid the bone. The tip should be in the center of the meat.
Hold it steady for a few seconds. The USDA standard is 165°F for poultry.
Two types of thermometers. An instant-read thermometer is good for checking at the end of cooking. A probe-style thermometer can stay in the chicken during cooking. Some air fryers have a built-in probe port.
You close the basket and monitor the temperature on a display. That's the most convenient option.
The cost. A good digital thermometer costs between $15 and $30. That's a small investment for food safety. It pays for itself the first time it prevents a trip to the emergency room.
The most common mistake. People insert the probe too shallow. The tip needs to be in the center, not near the surface. If you hit resistance, you've hit bone.
Pull back and try a different angle.
Aggregate reviews from thousands of home cooks confirm that the thermometer is the single most important tool for air fryer chicken. Don't skip it.
Frequently Asked Questions
Can I cook frozen chicken breast in an air fryer without thawing it first?
Yes, you can cook frozen chicken breast in an air fryer. Add 5 to 10 minutes to the usual cooking time. Keep the temperature at 375°F.
Flip it halfway. Always check the internal temperature. The thickest part must reach 165°F before serving.
How do I know when air fryer chicken is done without a thermometer?
You cannot reliably tell without a thermometer. Color and juices are not accurate indicators. The outside can look fully cooked while the center is still raw.
Using a thermometer is the only safe method. It is a small investment that prevents foodborne illness.
Why is my air fryer chicken dry and tough?
Dry chicken usually means it was overcooked or cooked at too high a temperature. Pull the chicken at exactly 165°F. Let it rest for 5 minutes before cutting.
Brining for 30 minutes beforehand also helps lock in moisture. Thinner breasts need less time.
Can I cook multiple chicken breasts at the same time?
Yes, but do not overcrowd the basket. Arrange them in a single layer with space between each piece. If they touch or overlap, the air cannot circulate properly.
Cook in batches if needed. Overcrowding leads to steaming instead of roasting.
Bottom Line: Safe, Simple, and Delicious Air Fryer Chicken
Cooking raw chicken breast in an air fryer is straightforward when you follow the rules. Preheat the appliance. Pat the chicken dry.
Season it lightly. Cook at 375°F until the internal temperature hits 165°F. Flip it halfway.
Let it rest. Use a meat thermometer every single time. That one tool separates a safe, juicy meal from a risky gamble.
The air fryer makes it fast and easy. The thermometer makes it safe.