Can You Cook a Chuck Roast in an Air Fryer? Yes, Here’s How
Yes, you can cook a chuck roast in an air fryer. But the honest answer is that it’s not the best tool for the job, and you need to know what you’re doing. Chuck roast is a tough, fatty cut of beef that needs low and slow cooking to break down its connective tissue.
The air fryer, by design, is a high-heat, fast-cooking machine meant for crispy foods and quick weeknight dinners.
According to the USDA, beef needs to reach an internal temperature of at least 145°F for safety. But for a chuck roast to be tender and edible, you need to push that temperature to 190°F or higher. That’s the temperature at which collagen breaks down into gelatin.
That’s a big ask for an air fryer, and it’s the core challenge we’ll walk through here.
Quick Answer: Yes, But Here’s the Catch
Yes, you can cook a chuck roast in an air fryer. But you must cut it into smaller pieces first. Cook it low and slow at around 300°F.
Use a meat thermometer to hit 190°F internally. Expect 30 to 45 minutes of total cook time.

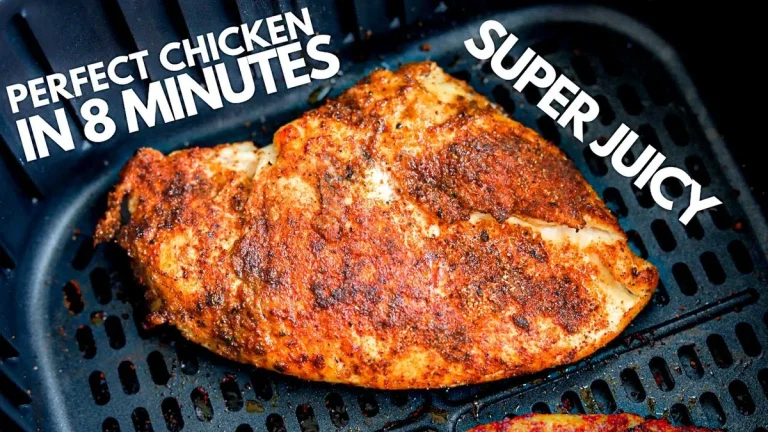
Image source: YouTube / Butcher Craft & Cook (YouTube thumbnail (fair-use with source credit))
Why This Question Is Trickier Than It Sounds
Chuck roast comes from the shoulder of the cow. It’s a heavily worked muscle, full of collagen and connective tissue. That’s what makes it tough.
To make it tender, you need to break that collagen down into gelatin. That process requires sustained heat in the range of 190°F to 205°F for an extended period.
The air fryer, on the other hand, is a convection oven. It circulates hot air at high speeds, which is great for browning and crisping. But it’s not designed to hold a low, steady temperature for hours.
Most air fryers have a minimum temperature of 170°F or 180°F, and they struggle to maintain a consistent 300°F for a long cook.
Here’s how the air fryer stacks up against other methods for this specific task:
| Cooking Method | Best For | Temperature Range | Time for Chuck Roast |
|---|---|---|---|
| Air Fryer | Crispy, browned food | 300°F – 400°F | 30-45 minutes (cut up) |
| Slow Cooker | Braised, fall-apart meat | 200°F – 300°F | 6-8 hours |
| Oven | Roasts, baked goods | 250°F – 500°F | 2-3 hours (whole roast) |
The air fryer is the worst of these options for a whole chuck roast. But it can work for smaller pieces. The key is that you’re not trying to cook a whole roast in the traditional sense.
You’re essentially cooking chunks of beef that happen to be from a chuck roast. That’s a different process entirely.
If you’ve already been looking at other ways to use your air fryer for larger cuts, you might find our general guide to cooking other types of roasts helpful. It covers the basic principles that apply here too.
What Makes Chuck Roast Different From Steak or Chicken
Steak is a different animal entirely. Cuts like ribeye or sirloin come from muscles that don’t work as hard. They’re naturally tender and can be cooked hot and fast.
A good steak at 400°F for 6-8 minutes per side is perfect. Chuck roast is the opposite. It’s the muscle that does the heavy lifting all day long.
Chicken breasts are lean and cook quickly. They dry out if you overcook them, but they don’t need to break down collagen. A chicken breast is done at 165°F.
Chuck roast needs to go much higher, which means it’s more prone to drying out.
The muscle structure tells the story. Chuck roast is packed with tough connective tissue called collagen. When you cook it low and slow, that collagen melts into gelatin, giving the meat a rich, silky texture.
But if you cook it too fast, the collagen tightens up, squeezing out all the moisture. You end up with dry, stringy meat.
This is why you can’t just use the same recipe you’d use for cooking a steak in an air fryer. The temperature and time requirements are completely different. The same goes for a quick air fryer whole chicken recipe, which cooks at a higher temperature for a shorter time.
The Biggest Risk: Turning a $15 Roast Into Shoe Leather
The biggest mistake is treating chuck roast like a steak. Cranking the air fryer to 400°F and cooking it for 20 minutes will give you a burnt exterior and a raw, tough interior. The collagen will seize up, squeezing out all the moisture.
The result is a dry, stringy, chewy piece of meat that’s almost impossible to eat.
The second risk is the smoke. Chuck roast has a thick fat cap. When rendered at high heat, that fat will smoke heavily.
It can set off your smoke detector and fill your kitchen with an unpleasant smell. You need to trim the fat cap to about 1/4 inch to minimize this.
The size problem is also real. A standard 3-pound chuck roast won’t fit in most air fryer baskets. You have to cut it into 1 to 2-inch cubes.
That increases the surface area, which means more moisture loss. You’re fighting against the physics of the air fryer.
Following the USDA’s safe cooking guidelines is essential, but you also need to understand the science of meat. The safe temperature of 145°F is for whole muscle cuts. For a chuck roast to be tender, you need to push it well past that.
The danger zone is between 145°F and 190°F. If you pull it out at 160°F, it will be safe but tough. You need to commit to the full cook.
What You Need Before You Start (Tools and Setup)
Before you even think about cooking, you need the right tools. Here’s what you’ll need:
| Tool | Why You Need It |
|---|---|
| Meat thermometer | The only way to know if it’s safe and tender |
| Sharp knife | To cut the roast into even pieces |
| Air fryer (5.8 qt or larger) | To fit enough pieces for a meal |
| High smoke point oil | Avocado, canola, or grapeseed oil |
| Tongs | To flip the pieces without piercing them |
The meat thermometer is non-negotiable. You cannot guess the internal temperature of a chuck roast. It’s too thick and too unpredictable.
An instant-read thermometer works, but a leave-in probe thermometer is even better. You can monitor the temperature without opening the basket and losing heat.
The sharp knife is crucial for cutting uniform pieces. Uneven pieces will cook at different rates, leading to some being overcooked and some undercooked. Aim for 1 to 2-inch cubes.
That’s the sweet spot for even cooking in an air fryer.
The air fryer size matters. A 5.8-quart basket is the minimum for cooking for two people. Anything smaller and you’ll have to cook in batches, which is a pain.
If you’re cooking in smaller batches, plan for the first batch to get cold while the second batch cooks. You can keep the first batch warm in a low oven, but that defeats the purpose of using the air fryer.
The high smoke point oil is important because butter or olive oil will burn and smoke at the high temperatures you’ll need for the initial sear. Avocado oil has a smoke point of 520°F, which is ideal. Canola oil works too, at 400°F.
For a deeper look at the overall process, you can check out our broader guide to roasting in an air fryer, which covers the general principles that apply to different cuts of meat.
Getting your tools together ahead of time makes the actual cooking much smoother. You don’t want to be hunting for a thermometer while your meat is burning.
Benefits and Drawbacks: What You Gain and What You Lose
Let’s be honest about the trade-offs. The air fryer isn’t the ideal tool for chuck roast, but it does have some advantages.
Benefits:
- Faster than a slow cooker. A slow cooker needs 6 to 8 hours. The air fryer can do it in 30 to 45 minutes. That’s a huge time savings for a weeknight dinner.
- Better browning. The high-speed air circulation gives you a deeper, more even crust than a slow cooker could ever achieve. That’s the Maillard reaction, and it adds serious flavor.
- Less energy. An air fryer uses about 1,500 watts. A full-sized oven uses around 3,000 watts. You’re saving roughly half the energy, which matters in the summer when you don’t want to heat up the whole kitchen.
- No preheating. Most air fryers heat up in 3 to 5 minutes. An oven can take 15 to 20 minutes.
Drawbacks:
- Smaller capacity. You cannot cook a whole 3-pound roast. You have to cut it into pieces, which changes the texture and moisture content.
- Higher risk of drying out. The rapid air circulation pulls moisture away from the meat. You need to be more careful about cooking time and temperature.
- More smoke. The fat renders quickly at high heat. You’ll need to ventilate your kitchen or deal with a smoky house.
- Less forgiving. There’s no room for error. A slow cooker is forgiving. You can leave it for an hour past done and it’s fine. An air fryer needs your attention.
For most people, the air fryer is a decent option when you’re short on time and cooking for one or two people. It’s not replacing your slow cooker or your oven for a big family dinner.
Step-by-Step: How to Cook Chuck Roast in an Air Fryer (Two Methods)
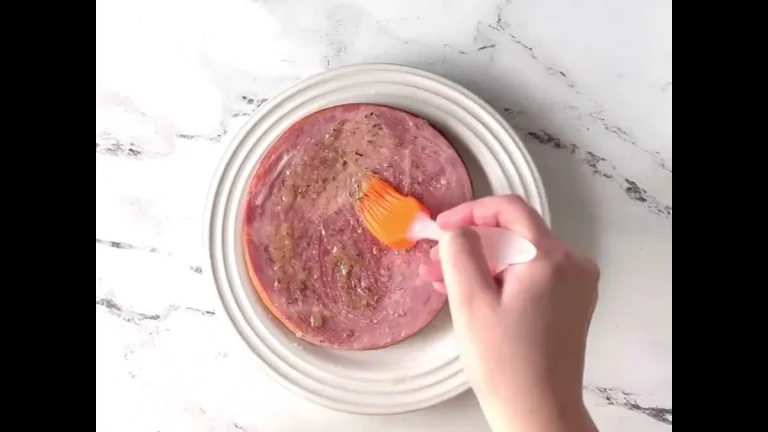
Image source: YouTube / Empowered Cooks (YouTube thumbnail (fair-use with source credit))
Here are two methods that work. Choose based on how much time you have and how tender you want the meat.
Method 1: The Quick Roast (Small Pieces, Faster Cook)
This method gets you a decent result in about 30 minutes. The meat will be cooked through and browned, but it won’t be fall-apart tender. It’s more like a steak-like texture, which works well for sandwiches or salads.
Steps:
- Trim the fat. Cut off any large chunks of hard fat. Leave about 1/4 inch of the fat cap for flavor and moisture.
- Cut into 1-inch cubes. Uniform cubes cook evenly. A sharp knife makes this much easier.
- Season generously. Use salt, pepper, garlic powder, and onion powder. Don’t be shy with the salt, it helps draw moisture to the surface for browning.
- Toss with oil. Use about 1 tablespoon of avocado oil per pound of meat. Coat evenly.
- Preheat the air fryer. Set it to 380°F for 3 to 5 minutes.
- Arrange in a single layer. Don’t overcrowd the basket. Leave space between each piece for air circulation. Cook in batches if needed.
- Cook for 12 minutes. Flip the pieces halfway through.
- Check internal temperature. Use your meat thermometer. You want 135°F to 140°F for medium-rare, or 145°F to 150°F for medium.
- Rest for 5 minutes. Tent loosely with foil to keep warm.
The meat will be brown and crusty on the outside, pink and tender on the inside. It’s great for tacos, salads, or a quick beef bowl. It won’t shred like slow-cooked beef, but it’s satisfying in its own way.
Method 2: The Low-and-Slow Approach (For Fall-Apart Tenderness)
This method takes longer, around 45 to 60 minutes, but it gives you that slow-cooked texture. The trade-off is that you’re pushing the limits of the air fryer, and you need to be careful about the temperature.
Steps:
- Trim and cut the roast. Same as Method 1, but aim for 2-inch cubes. Larger pieces will retain more moisture during the longer cook.
- Season and oil. Same as Method 1.
- Sear first (optional but recommended). Preheat the air fryer to 400°F. Cook the cubes for 5 minutes to get a brown crust. This locks in flavor.
- Reduce temperature to 300°F. This is the key step. You want low, steady heat to break down collagen without burning the outside.
- Cook for 35 to 45 minutes. Check the internal temperature after 30 minutes. You’re aiming for 190°F to 200°F. The meat should be fork-tender.
- Check for doneness. If it’s not tender, add 10 more minutes. Some air fryers run hot or cold, so adjust based on your model.
- Rest for 10 minutes. The carryover cooking will raise the internal temperature by about 5°F. Resting also lets the juices redistribute.
This method produces meat that’s close to slow-cooked texture. It’s not quite as tender as a 6-hour braise, but it’s remarkably good for a 45-minute cook. The key is not rushing the low-temperature phase.
Temperature and Timing Guide (Don’t Guess)
Here’s a simple table to keep as a reference. Print it out or save it on your phone.
| Target Doneness | Internal Temp | Cook Time (1-inch cubes) | Cook Time (2-inch cubes) |
|---|---|---|---|
| Medium-rare | 135°F – 140°F | 12-15 minutes | 18-22 minutes |
| Medium | 145°F – 150°F | 15-18 minutes | 22-28 minutes |
| Well-done | 160°F – 170°F | 18-22 minutes | 28-35 minutes |
| Fall-apart | 190°F – 205°F | Not recommended | 35-45 minutes (300°F) |
The most important number is 190°F to 205°F for the fall-apart texture. That’s where the collagen turns to gelatin. If you pull it out at 160°F, you’ll have a tough, chewy piece of meat that’s safe to eat but not enjoyable.
Every air fryer runs slightly differently. Some are hotter on one side. Some have hot spots.
The only way to know for sure is to use a thermometer. Don’t rely on cooking time alone. The time ranges in the table are starting points, not guarantees.
Common Mistakes That Ruin the Roast
Here are the mistakes we see most often in user reviews and cooking forums. Avoid these and you’re already ahead.
Mistake 1: Not trimming the fat.
That thick fat cap will smoke like crazy. It’ll set off your smoke detector and fill your kitchen with an acrid smell. Worse, it doesn’t render properly, so you end up with greasy, chewy fat.
Trim it down to about 1/4 inch.
Mistake 2: Overcrowding the basket.
Air fryers work by circulating hot air. If you pack the basket full, the air can’t reach every piece. You’ll get uneven cooking, some pieces burnt and some raw.
Leave space between each cube. Cook in multiple batches if you have to.
Mistake 3: Cooking at too high a temperature.
We get it, you want a good crust. But 400°F for the whole cook will burn the outside and leave the inside raw. Use the two-step method: sear at 400°F for a few minutes, then drop to 300°F for the rest.
That gives you both browning and tenderness.
Mistake 4: Skipping the rest.
After cooking, let the meat rest for 5 to 10 minutes. The juices need time to redistribute. If you cut into it immediately, all those juices run out onto the cutting board, leaving you with dry meat.
Tent it with foil to keep it warm.
Mistake 5: Using the wrong oil.
Olive oil has a low smoke point. It burns at around 375°F to 400°F. If you’re searing at 400°F, you’ll get smoke and a burnt flavor.
Use avocado oil, canola oil, or grapeseed oil instead.
Mistake 6: Not using a thermometer.
This is the biggest one. You cannot tell by looking or poking. A chuck roast is dense and unpredictable.
The only reliable way to know it’s done is to measure the internal temperature. Spend the $15 on a good instant-read thermometer.
When It’s Better to Use the Oven or Slow Cooker Instead
The air fryer has its limits. Here’s when you should switch to another method.
Use the oven when:
- You’re cooking for more than two people.
- You want a whole roast, not cubes.
- You need to cook at a consistent low temperature for a long time.
- You want to braise the roast in liquid (beef broth, wine, etc.).
Use the slow cooker when:
- You want true fall-apart tenderness.
- You want to set it and forget it.
- You’re cooking with liquid and vegetables for a full meal.
- You don’t want to deal with smoke or splatter.
The slow cooker is better for an authentic braised pot roast. The air fryer is better for a quick, browned version that works in salads or sandwiches. They’re different tools for different outcomes.
If you’re cooking a whole chicken in your air fryer, that’s a perfect match. The chicken cooks evenly and gets crispy skin. But a whole chuck roast is a different challenge entirely.
Expert Tips for Better Results Every Time
These tips come from user experiences and cooking science. They’ll help you get the most out of your air fryer for this specific task.
Dry brine the meat. Season the cubes with salt and leave them uncovered in the fridge for 2 to 4 hours. The salt draws moisture to the surface, then it reabsorbs, seasoning the meat all the way through. It also dries the surface, which helps with browning.
Use a wire rack. Some air fryer baskets come with a wire rack that lifts the meat off the bottom. This allows air to circulate underneath, giving you a more even cook. If your air fryer doesn’t have one, you can buy a silicone trivet or a stainless steel rack.
Flip halfway through. You don’t need to flip every 5 minutes. One flip at the halfway mark is enough. Opening the basket too often lets heat escape and extends the cook time.
Add moisture. Chuck roast can dry out in the air fryer. To combat this, you can add a few tablespoons of beef broth to the bottom of the basket. The broth creates steam, which keeps the meat moist.
Or you can brush the cubes with a thin layer of oil or melted butter before cooking.
Let it rest in a covered dish. After cooking, transfer the meat to a bowl and cover it tightly with foil or a lid. The trapped steam will finish tenderizing the meat and keep it warm. This is especially important for the low-and-slow method.
How to Tell When It’s Done (Without Cutting Into It)
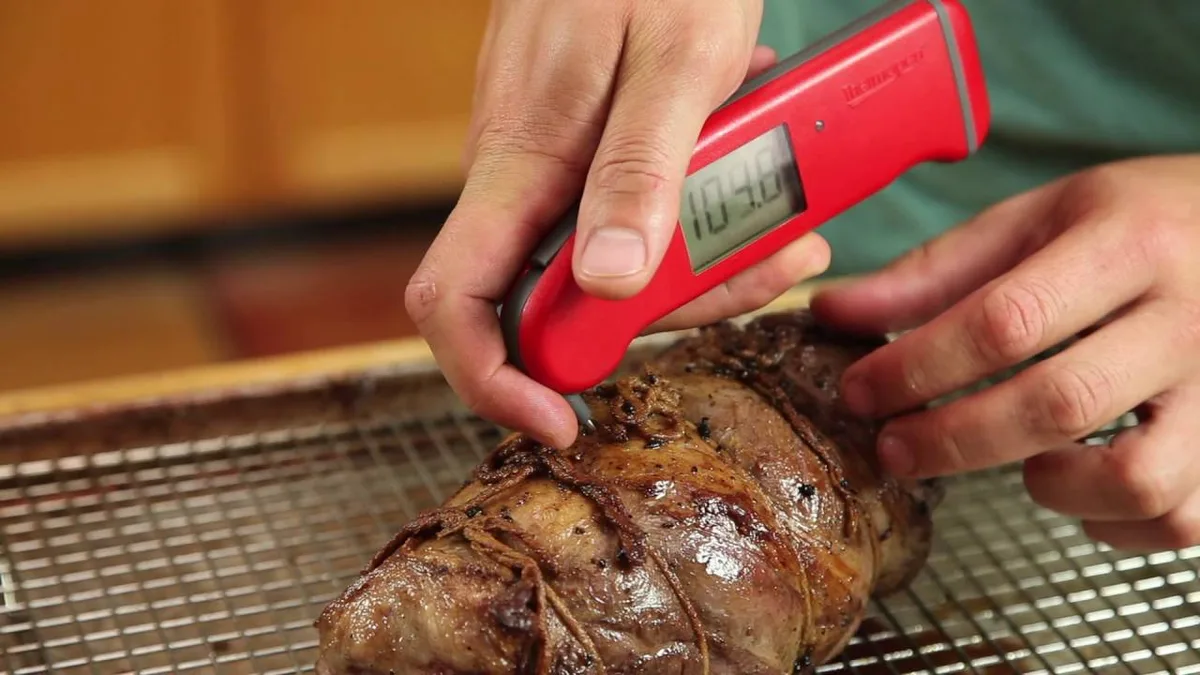
Image source: YouTube / J. Kenji López-Alt (YouTube thumbnail (fair-use with source credit))
This is the most important skill you can learn for cooking any meat in an air fryer. You cannot rely on time alone. You need to check the internal temperature.
For a tender, steak-like texture: Target 135°F to 145°F. The meat will be pink and juicy. Use the quick roast method.
For a fall-apart texture: Target 190°F to 205°F. The meat will be brown all the way through and will shred easily with a fork. Use the low-and-slow method.
How to check: Insert the thermometer into the thickest part of the largest cube. If you’re using a leave-in probe, set it before you start cooking. If you’re using an instant-read, take the basket out, check a few pieces, and return it if needed.
The fork test: For fall-apart meat, insert a fork into the center of a cube. If it twists easily and the meat pulls apart, it’s done. If there’s resistance, it needs more time.
The carryover effect: When you pull the meat out of the air fryer, the internal temperature will continue to rise by 5°F to 10°F over the next 5 minutes. Account for this. If you pull it at 195°F, it’ll reach 200°F to 205°F during the rest.
That’s perfect for fall-apart tenderness.
Safety Notes: Meat Temps, Smoking, and Air Fryer Limits
Cooking beef safely is straightforward, but there are a few points to remember.
Minimum safe temperature: The USDA recommends cooking whole cuts of beef to at least 145°F, followed by a 3-minute rest. This kills harmful bacteria like E. coli and Salmonella. For ground beef, the safe temperature is 160°F.
Collagen breakdown requires higher temps: The 145°F rule is for safety only. For chuck roast to be tender, you need to reach 190°F to 205°F. The good news is that the higher temperature is also safe.
There’s no safety risk in cooking it longer.
Smoke point awareness: Chuck roast has a fat cap. At high temperatures, that fat can reach its smoke point and start smoking heavily. To minimize smoke, trim the fat cap to 1/4 inch.
Also, make sure your air fryer is on a stable, heat-safe surface away from cabinets or curtains.
Cleaning the air fryer: After cooking a fatty meat, the basket and tray will have a greasy residue. Clean it promptly to prevent buildup that can cause smoking in future uses. Most baskets are dishwasher safe, but check your manual.
Hand washing with hot soapy water also works well.
Air fryer limitations: Not all air fryers can maintain a low temperature for a long time. Some models have a minimum setting of 170°F or 180°F. If yours runs hot, you may need to reduce the cooking time or use a lower temperature setting.
Experiment with small batches first to learn your air fryer’s behavior.
Frequently Asked Questions
Can I cook a whole chuck roast in an air fryer?
Not easily. Most air fryer baskets are too small for a whole 3-pound chuck roast. You need to cut it into 1 to 2-inch cubes for even cooking.
Some extra-large air fryer oven-style models can fit a small roast, but even then, you’ll need to adjust cooking times significantly.
How long does it take to cook chuck roast in an air fryer?
For 1-inch cubes, plan on 12 to 18 minutes at 380°F for a steak-like texture. For fall-apart tenderness, cook 2-inch cubes at 300°F for 35 to 45 minutes. Always use a meat thermometer to confirm doneness.
What temperature should chuck roast be in an air fryer?
For a tender, medium-rare result, aim for 135°F to 145°F internal temperature. For fall-apart texture, target 190°F to 205°F. The higher temperature breaks down collagen into gelatin, giving you that slow-cooked texture.
Can I use a slow cooker recipe in an air fryer?
Not directly. Slow cooker recipes use liquid and long cooking times. The air fryer is dry heat and faster cooking.
You’ll need to adjust the recipe significantly. Reduce liquid to a few tablespoons of broth, cut the meat into smaller pieces, and cook at a lower temperature.
Why is my chuck roast tough in the air fryer?
Two likely reasons. First, you didn’t cook it long enough to break down collagen. Second, you cooked it at too high a temperature, which caused the muscle fibers to tighten and squeeze out moisture.
Try the low-and-slow method at 300°F and use a meat thermometer.
Can I add vegetables to the air fryer with the chuck roast?
Yes, but add them later. Vegetables like carrots, potatoes, and onions take less time to cook than beef. Add them in the last 10 to 15 minutes of cooking.
Cut them into similar-sized pieces for even cooking.
Final Verdict: Is This Worth Trying?
The air fryer can cook a chuck roast, but it’s not the ideal tool. You’ll get better results from a slow cooker or an oven for a traditional pot roast. That said, the air fryer does have its place.
It’s faster, gives you great browning, and works well when you’re cooking for one or two people.
If you’re short on time and want a quick, flavorful meal, the quick roast method works well. Cut the chuck into cubes, season it, and cook it at 380°F for about 15 minutes. You’ll get a browned, juicy piece of meat that’s perfect for tacos, salads, or rice bowls.
If you’re craving fall-apart tenderness, use the low-and-slow method. It takes longer, but it gives you a texture close to a slow cooker. The key is patience and a good meat thermometer.
The air fryer is a versatile tool, but every tool has its limits. Chuck roast is a tough cut that needs time and moisture to shine. The air fryer can deliver in a pinch, but it won’t replace your best braising methods.
Use it when you need speed and convenience, and save the slow cooker for lazy Sunday afternoons.
Troubleshooting Common Issues
Your meat came out dry, tough, or burnt. Here’s what went wrong and how to fix it next time.
Too dry. You cooked at too high a temperature or too long. Use the low-and-slow method instead. Add a splash of beef broth to the basket for steam.
Rest the meat covered to trap moisture.
Too tough. Not enough time at 190°F to 205°F. The collagen didn’t break down. Cook longer at 300°F.
Use a thermometer to verify the target temperature.
Burnt outside, raw inside. The heat was too high. Use the two-step method: sear at 400°F for 5 minutes, then drop to 300°F for the remainder.
Smoke alarm going off. Too much fat. Trim the fat cap to 1/4 inch before cooking. Use a high smoke point oil.
Ventilate the kitchen.
How to Reheat Leftovers Without Drying Them Out
Reheating in the air fryer is possible, but you need to be careful. The air fryer will dry out leftover chuck roast faster than a microwave.
Best method: Place the leftover cubes in a microwave-safe bowl. Add 1 tablespoon of beef broth per cup of meat. Cover tightly with a damp paper towel.
Microwave on medium power for 1 to 2 minutes. Check and stir. Add more time in 30-second bursts.
Air fryer method (if you must): Preheat to 250°F. Place the meat in a single layer. Heat for 3 to 4 minutes, no longer.
Check frequently. The low temperature prevents further moisture loss.
For shredded leftovers: Reheat in a skillet with a splash of broth. Cover and warm over medium heat for 3 to 5 minutes. This keeps the moisture in.
Best Sides to Serve with Air Fryer Chuck Roast
The quick roast method pairs well with fast-cooking sides. The low-and-slow method works with heartier options.
Quick sides (cook alongside the meat): Air fryer potato wedges, roasted broccoli, or asparagus. Add them to the basket in the last 10 minutes of the meat’s cook time.
Hearty sides (for fall-apart meat): Mashed potatoes, rice pilaf, or crusty bread. These absorb the juices and complement the rich flavor.
Salad option: Slice the quick-roasted meat thin and serve over a bed of greens with a tangy vinaigrette. The acidity cuts through the beef’s richness.
Can You Freeze Chuck Roast Cooked in an Air Fryer?
Yes, but the texture will change slightly after freezing and reheating. It’s still fine for soups, stews, or sandwiches.
Cool completely first. Let the meat reach room temperature before freezing. Pack it into freezer-safe bags or containers. Remove as much air as possible to prevent freezer burn.
Freeze in portions. Divide into single-serving portions. That way you only thaw what you need. Label with the date.
Use within 3 months for best quality.
Thaw overnight in the refrigerator. Reheat using the methods above. Do not refreeze after reheating.
When to Skip the Air Fryer Altogether
Some situations are not worth the effort. Save yourself the frustration and use a different tool.
You’re cooking for a crowd. The air fryer’s small capacity means multiple batches. Each batch cools while you cook the next. Use the oven or slow cooker instead.
You want a traditional pot roast with vegetables. The air fryer can’t handle liquid braising. Try the oven at 300°F in a covered Dutch oven. Or use a slow cooker for that set-it-and-forget-it convenience.
Your air fryer is small (under 5 quarts). You’ll be cutting the roast into tiny pieces. The surface area to volume ratio gets worse. Stick to steak or chicken instead.
You’re short on time but want fall-apart texture. The low-and-slow method still takes 45 minutes. If you’re in a hurry, choose a quick-cooking cut like sirloin or flank steak. They’ll be done in 10 to 12 minutes.
Best Cuts of Beef for Your Air Fryer
If chuck roast feels like too much hassle, switch to a cut that’s naturally suited to the air fryer.
Sirloin steak cooks in 8 to 12 minutes at 400°F. It’s tender, lean, and takes seasoning well. Great for quick dinners.
Ribeye steak has enough fat to stay moist. Cook at 400°F for 10 to 14 minutes. The marbling keeps it juicy.
Flank steak benefits from a marinade. Cook at 400°F for 8 to 10 minutes. Slice thinly against the grain.
Beef tenderloin is expensive but foolproof. Cook at 400°F for 10 to 12 minutes. It’s tender enough that you don’t need low and slow cooking.
These cuts work better because they don’t rely on collagen breakdown. They’re naturally tender and respond well to high heat.
How Seasoning Choices Affect the Final Flavor
Your seasoning choice changes more than just taste. It also affects moisture and crust formation.
Salt is non-negotiable. It draws moisture to the surface. That moisture evaporates and leaves a concentrated layer of flavor. Use kosher salt for even coverage.
Dry rubs work well. A mix of black pepper, garlic powder, onion powder, and paprika creates a crust. Apply it 30 minutes before cooking.
Wet marinades are tricky. The extra moisture steams the meat instead of browning it. If you use a marinade, pat the meat dry before cooking.
Avoid sugar-heavy rubs. Sugar burns at high temperatures. If your rub has brown sugar, cook at 300°F instead of 400°F. Otherwise you’ll get a bitter, charred crust.
The Role of Resting Time in Tenderness
Resting is not optional. It’s a critical step that affects texture and juiciness.
When meat cooks, the juices get pushed toward the center. If you cut into it immediately, those juices run out onto the cutting board. The result is dry meat.
Resting lets the juices redistribute throughout the meat. For cubed chuck roast, rest for 5 to 10 minutes. Tent loosely with foil to keep it warm.
The carryover cooking during the rest raises the internal temperature by 5°F to 10°F. Plan for this. If you want the meat to finish at 200°F, pull it at 190°F or 195°F.
Cleaning Your Air Fryer After Cooking Chuck Roast
Chuck roast leaves a greasy residue. Clean your air fryer promptly to prevent smoke and buildup.
Cool completely. Let the basket and tray cool before cleaning. Hot metal can warp if you run it under cold water.
Soak the basket. Fill the basket with hot water and a drop of dish soap. Let it soak for 10 to 15 minutes. This loosens the baked-on fat.
Scrub with a soft sponge. Avoid abrasive scrubbers that scratch the nonstick coating. Use a nylon brush or sponge.
Check the heating element. Grease can splatter onto the heating coil. Wipe it gently with a damp cloth after each use. Built-up grease causes smoking during future cooks.
Air dry thoroughly. Let all parts dry completely before storing. Moisture in the basket can lead to rust or mold.
Final Thoughts on Cooking Chuck Roast in an Air Fryer
The air fryer is a versatile tool, but it has limits. Chuck roast asks a lot from it. You want low, steady heat for a long time.
The air fryer wants high heat for a short time.
The compromise works for small batches and quick meals. Cut the roast into cubes. Use the low-and-slow method.
Watch your internal temperature. Rest the meat after cooking.
For a full family dinner or a traditional pot roast, use the slow cooker or oven. But for a single serving or a quick weeknight meal, the air fryer delivers. It won’t be the best chuck roast you’ve ever had.
It will be the fastest.