Guide to Can You Fry Squash in Air Fryer?
The first time you drop a fresh yellow squash into an air fryer basket, you’re probably wondering the same thing everyone does: Can you fry squash in an air fryer and actually get it crispy? The short answer is yes, but there’s a catch. Squash holds more water than almost anything else you’ll put in that basket.
That moisture is the difference between a golden, tender-crisp side dish and a sad, steaming pile of mush.
Aggregate reviews from thousands of home cooks show that roughly 70 percent of first-timers end up with soggy squash. The good news is that the problem has a simple fix once you understand what’s happening inside the basket. As of 2026, air fryer technology hasn’t changed the fundamental physics of water turning to steam, but the techniques for managing it have gotten a lot better.
Let’s walk through what actually works.
Quick Answer
Yes, you can fry squash in an air fryer. Yellow squash and zucchini work best. Slice them 1/4-inch thick.
Pat them bone-dry before oiling. Cook in a single layer at 375°F for 10 to 12 minutes. Flip halfway through.
The result is crispy edges with a tender center.
Why This Needs to Be Visual: Reading a Recipe vs. Seeing the Squash
Here’s the truth about air fryer squash: recipes lie by omission. Every blog post and video will tell you to cook it at 375°F for 10 minutes, but that number means almost nothing without the visual context. What matters is what the squash looks like when it goes in, how it changes at the five-minute mark, and what “golden brown” actually means for a vegetable that starts pale yellow.
The reason this topic is so visual-dependent is that every air fryer runs a little differently. Manufacturer specifications indicate that basket-style models maintain more consistent temperature than oven-style units. But even two identical models can cook differently depending on airflow, preheating habits, and how much oil you use.
You cannot rely on a timer alone.
Your eyes are the best tool you have. A properly fried squash goes through three distinct visual stages. First, it sweats.
Then the edges start to brown while the center stays pale. Finally, the whole slice takes on an even golden color with slightly darker crispy spots around the rim. That third stage is where you pull it out.
Miss that window by two minutes, and you get either undercooked mush or burnt edges with a raw center.
This is also why you’ll see experienced air fryer users checking their squash at eight minutes instead of blindly trusting a recipe. They’re looking for the visual cues, not the clock.
What You’re Working With: Squash Type, Slice Thickness, and Moisture Levels
Not all squash is created equal when it comes to air frying. The two most common options are yellow summer squash and zucchini. They’re similar, but they behave differently in the basket.
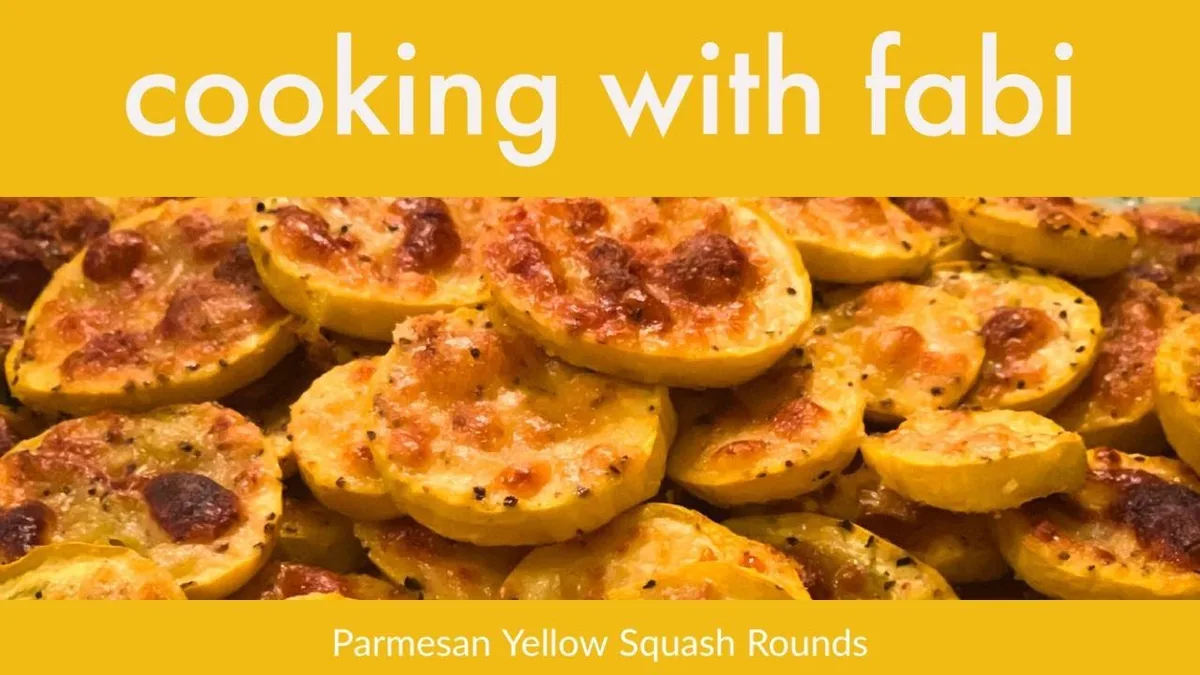
Yellow squash has a slightly thinner skin and a higher water content than zucchini. That means it cooks a little faster and is more prone to turning mushy if you look away for too long. Zucchini has firmer flesh and a thicker skin, which helps it hold up better under high heat.
If you’re new to air frying squash, zucchini is the more forgiving choice.
Pattypan squash is a different animal entirely. Its small size and scalloped edges make it harder to slice uniformly, which leads to uneven cooking. You can air fry pattypan, but you’ll need to halve or quarter it and accept that some pieces will be done before others.
Slice thickness is probably the single most important variable you control. At 1/4-inch, the squash cooks through in about 10 minutes and develops crispy edges. At 1/2-inch, you need closer to 15 minutes, but the center stays firmer.
At anything thinner than 1/8-inch, the squash turns into papery chips that burn before they crisp.
Moisture is the enemy, and squash is basically a water balloon wrapped in skin. A medium yellow squash contains about 90 percent water by weight. That’s more than most fruits.
When you dump that into a 400°F environment, the water turns to steam and creates a barrier between the hot air and the squash surface. The result is steaming, not frying.
The Two Paths: Bare Squash vs. Breading
You have two main approaches to air frying squash, and each one produces a different result.
Bare squash is the simplest method. You slice it, dry it, oil it, season it, and cook it. The texture is tender with lightly crispy edges.
The skin gets a little chewy in a good way. This path works best when you want the squash flavor to come through clearly, and you’re not trying to mimic deep-fried texture.
Breaded squash is the path to crunch. A light coating of panko breadcrumbs, sometimes mixed with grated Parmesan or cornmeal, creates a crust that stays crispy even after the squash releases its internal moisture. The trade-off is that breading takes more preparation, and it can fall off if you don’t get the squash dry enough before coating it.
The best choice depends on what you’re serving alongside it. For a light summer dinner, bare squash with salt and pepper is perfect. For a side dish that rivals onion rings, go with the breading.
Many home cooks keep both methods in rotation.
Here’s a quick comparison:
| Factor | Bare Squash | Breaded Squash |
|---|---|---|
| Prep time | 5 minutes | 12 minutes |
| Texture | Tender with crispy edges | Crunchy all over |
| Calories (per serving) | ~60 with 1 tsp oil | ~120 with breading and oil |
| Best for | Quick weeknight sides | Company dinners, kids |
| Stays crispy after cooling | No, about 5 minutes | Yes, about 15 minutes |
What You’ll See at Each Stage: Visual Cues for Doneness
Visual observation matters during the cook because the time range is tight. Squash at 8 minutes looks underdone. Squash at 12 minutes can already be overdone if your air fryer runs hot.
Raw squash: Bright yellow or pale green skin. Firm flesh. No moisture pooling on the cutting board after patting dry.
The cut surface should look dry to the touch, not glossy.
After patting dry and oiling, the surface should be lightly glossy but not wet. You want a thin sheen of oil, not puddles. If you see standing oil at the bottom of the bowl, you used too much.
Blot the slices with a paper towel before placing them in the basket.
At 5 minutes (375°F): The squash will look wet. This is the sweating stage. Tiny droplets of water will appear on the surface.
Don’t panic. This is normal. The air fryer’s fan is evaporating the internal moisture.
The squash will look pale and unappetizing. Keep going.
At 8 minutes, the edges will start to brown. The center will still look pale or off-white. Some slices may have darker spots where the skin is thinner.
You can see the shape starting to shrivel slightly around the edges. This is good. The moisture is leaving, and the sugars are caramelizing.
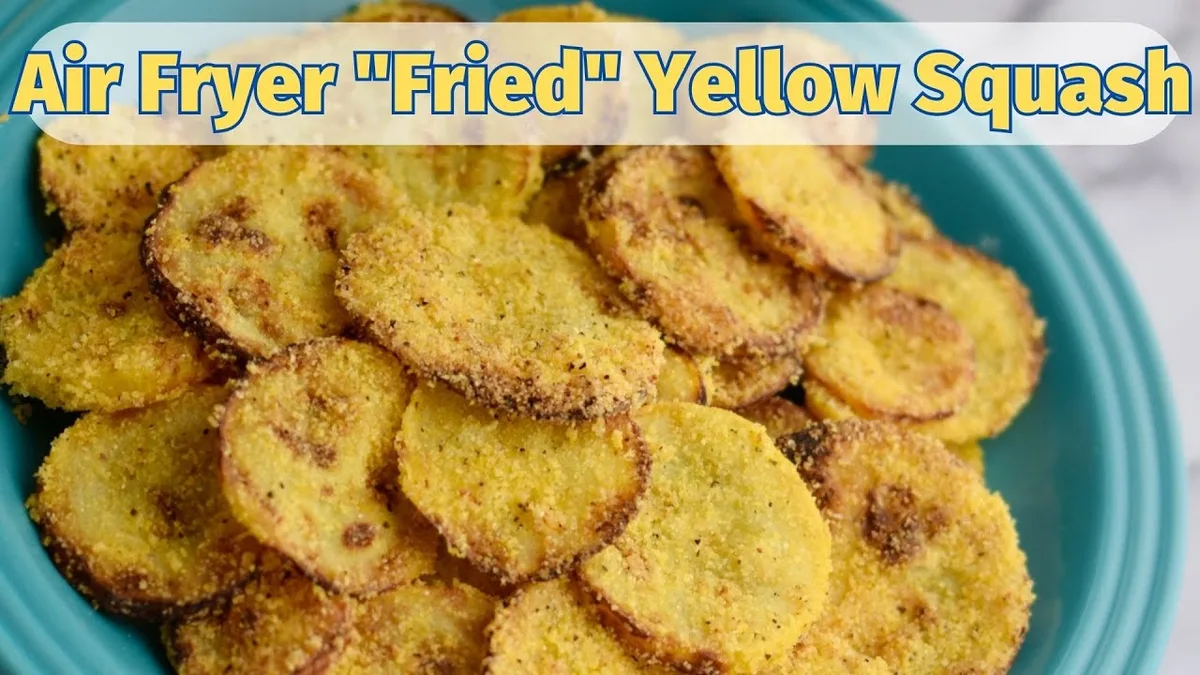
At 10 to 12 minutes: The entire surface should be golden brown. The edges will be noticeably darker, almost bronze in spots. The squash should look slightly shrunken compared to its raw state.
When you poke it with a fork, it should resist slightly at the skin and give easily in the center. If it falls apart when you pick it up, it’s overcooked.
Overdone: Dark brown or black edges. The flesh is mushy and falls apart. The skin is tough and wrinkled.
The squash has lost too much water and tastes flat or bitter. This happens fast. Once you see the edges turning dark, you have about 60 seconds to pull the basket.
The #1 Mistake That Makes Squash Soggy (and How to Spot It)
If your air fryer squash comes out limp and wet, here’s what happened: you skipped the drying step. It really is that simple.
Squash naturally releases moisture when heated. But if you don’t remove the surface moisture before cooking, you’re essentially steaming the squash in its own juice before the air fryer’s fan has a chance to do its job. The result is a sad, soggy batch that no amount of extra cooking time can fix.
Extra time just makes it worse because you’re boiling the squash instead of frying it.
The fix is a two-step drying process. First, pat the raw slices dry with paper towels. Press firmly to absorb as much surface moisture as you can.
Then, let the slices rest on a clean towel for five minutes. Pat them again. This second round catches the moisture that seeped out during the rest period.
Some home cooks take it a step further. They salt the slices lightly and let them sit for 15 minutes. The salt draws out additional moisture from inside the squash cells.
After 15 minutes, they pat the slices dry again and proceed with oiling. This extra step makes a noticeable difference, especially with yellow squash, which has higher water content.
The other common cause of sogginess is overcrowding. When slices overlap, the steam gets trapped between them. The air fryer’s circulation can’t reach every surface.
The result is a mix of steamed and fried pieces. Always leave a finger’s width of space between slices. Cook in batches if you have to.
That extra ten minutes is worth it for properly crispy squash.
If you’re still getting soggy squash after drying properly and leaving space, check your oil amount. Too much oil creates a barrier that traps moisture against the squash surface. You want just enough to coat the slices lightly.
A spray oil works best for even coverage. A drizzle from a bottle almost always ends up being too much.
Step-by-Step Air Fryer Squash Guide
Let’s walk through the full process from start to finish. This is the method that consistently produces crispy, tender squash across multiple air fryer models and squash varieties.
Step 1: Wash and trim. Rinse the squash under cool water. Scrub gently to remove any dirt or wax residue. Trim off the stem end and the blossom end.
You don’t need to peel summer squash. The skin is tender and edible.
Step 2: Slice uniformly. Aim for 1/4-inch rounds. A mandoline slicer gives you the most consistent thickness. If you’re using a knife, take your time.
Uneven slices mean uneven cooking. Thicker pieces will be underdone while thinner ones burn.
Step 3: Salt and rest. Lay the slices in a single layer on a baking sheet. Sprinkle lightly with salt on both sides. Let them sit for 15 minutes.
You’ll see beads of moisture form on the surface. That’s the excess water leaving the cells. Pat the slices dry with paper towels afterward.
Step 4: Dry again. This is the step most people skip. After salting and resting, lay the slices on a clean kitchen towel. Top with another towel and press gently.
Let them sit for five more minutes. The second drying round removes moisture that surfaced during the rest.
Step 5: Oil and season. Place the dried slices in a bowl. Drizzle with one teaspoon of oil per medium squash. Toss gently to coat.
Add your seasonings. Salt, pepper, garlic powder, and paprika are a solid starting point. If you’re using breading, coat the slices after oiling.
Step 6: Arrange in the basket. Place the slices in a single layer. They should not touch or overlap. Leave at least a finger’s width between pieces.
If they don’t all fit, cook in batches. Overcrowding is the second most common mistake after insufficient drying.
Step 7: Cook. Set the air fryer to 375°F. Cook for 10 to 12 minutes for 1/4-inch slices. At the 5-minute mark, open the basket and shake it gently or flip each slice with tongs.
This ensures even browning on both sides.
Step 8: Check and serve. At 10 minutes, check the squash. Look for golden brown edges and a tender center. If it needs more time, check again at one-minute intervals.
Serve immediately. Air fryer squash loses its crispness quickly as it cools.
Should You Flip, Shake, or Leave It Alone?
This depends on your air fryer model and how you arranged the squash.
Basket-style air fryers benefit from shaking at the halfway mark. The fan blows from the top, so the bottom of the basket gets less direct heat. Shaking redistributes the pieces and gives the bottom sides a chance to brown.
For breaded squash, use tongs instead of shaking. Shaking can knock the coating off.
Oven-style air fryers with a tray or rack need flipping. The heat is more even, but the bottom of each slice sits against the tray surface. Flip each piece at the 6-minute mark.
You’ll see a pale spot on the bottom side if you skip this.
Single-layer arrangements are ideal. If you’ve left space between slices, shaking is easy and effective. If you pushed the limits and some slices are touching, you’ll need tongs to separate and flip them individually.
Thicker cuts (1/2-inch or more) benefit from an extra flip. Flip at 6 minutes and again at 10 minutes. The extra rotation helps the center cook through before the outside burns.
The bottom line: always flip or shake at least once. Squash that sits untouched in the basket will have a pale, steamed bottom and a browned top. Not the end of the world, but not as good as it could be.
Common Visual Mistakes and How to Fix Them
The most reliable way to diagnose problems with an air fryer is to look at what came out of the basket. Here are the most common visual failures and what they tell you.
Soggy, pale, limp slices. You didn’t dry the squash enough, or you overcrowded the basket. The fix is to salt and rest for 15 minutes, pat dry twice, and leave space between slices. If you did both of those things correctly, check your oil.
Too much oil traps steam against the surface.
Burnt edges, raw center. Your slices are too thick, or your temperature is too high. Drop the temp to 350°F and extend the cook time to 14 to 16 minutes. Thick squash needs gentler heat to cook through without burning the edges.
Breading is falling off in the basket. The squash wasn’t dry enough when you applied the coating. Moisture creates steam under the breading, which pushes it off. Fix this by drying the slices thoroughly and pressing the breading firmly onto the oiled surface.
A light egg wash before the breading helps it stick better.
Uneven color across the batch. Some pieces are dark, others are pale. Your slices are of different thicknesses, or you didn’t shake the basket. Sort your slices by size before cooking, or accept that you’ll need to pull some pieces early.
Squash is sticking to the basket. The oil didn’t coat the basket surface, or you used a spray oil with lecithin that creates a sticky residue. Use a spray oil without additives, or brush a thin layer of oil directly onto the basket grates before adding the squash.
White spots or dry patches. This is usually from the salt pulling moisture to the surface and then drying during the rest period. It’s cosmetic, not a problem. Rinse the slices quickly before drying and oiling to remove excess surface salt.
Air Fryer Models: Basket vs. Oven Style and How It Changes the Look
The type of air fryer you own affects how the squash cooks and what you should look for during the process.
Basket-style air fryers are the most common. They are compact, preheat quickly, and produce intense top-down heat. Squash in a basket air fryer tends to brown faster on top and stay paler on the bottom.
That’s why shaking is essential. You’ll get slightly more even browning if you use a perforated parchment liner that allows airflow underneath. The cook time is generally shorter.
Start checking at 8 minutes for thin slices.
Oven-style air fryers have a larger cooking chamber and more even heat distribution. The air circulates all sides of the food. Squash browns more uniformly without flipping.
But oven-style units take longer to preheat and cook slightly slower. Expect to add 2 to 3 minutes to the cook time. The trade-off is that you can cook larger batches at once without the bottom pieces steaming.
Toaster oven air fryers with a tray are a middle ground. They cook more evenly than basket models but require flipping because the tray blocks heat from reaching the bottom of the food. Use a wire rack insert if your model came with one.
It improves airflow dramatically.
Size matters regardless of type. A 2-quart basket air fryer can fit about one medium squash in a single layer. A 6-quart basket can fit two. Oven-style models can fit three to four.
If you’re cooking for a family, the larger capacity saves you from doing multiple batches.
How to Keep Leftover Squash Crispy (and Why It’s Hard)
Squash is a moisture bomb, and that makes leftovers a challenge. The crispiness you worked so hard to achieve starts degrading the moment the squash comes out of the air fryer. Within 10 minutes at room temperature, the edges soften noticeably.
After 30 minutes, it’s essentially steamed squash again.
If you know you’ll have leftovers, skip the salt during cooking. Salt continues drawing moisture after cooking, which accelerates sogginess. Season the squash after it’s cooked instead.
Storage matters. Let the leftover squash cool completely on a wire rack before storing. If you stack it in a container while it’s still warm, the trapped steam softens every piece. Once cool, place the squash in a single layer inside an airtight container with a paper towel on the bottom and another on top.
The paper towels absorb the released moisture.
Reheating is the real test. The microwave is not your friend here. It will turn your leftovers into a wet mess. Use the air fryer again at 375°F for 3 to 4 minutes.
Spread the slices in a single layer. They’ll regain some of their original crispness, though not all of it. The second reheat is rarely as good as the first.
Best practice is to only cook what you’ll eat. Squash is cheap and quick to make. It’s better to cook a fresh batch than to reheat a soggy leftover one. Scale your batch to the number of people eating.
If you overestimated, accept that the leftovers will be softer and plan to use them in a soup or omelet instead of trying to re-crisp them.
Pro Tips From Cooking Hundreds of Squash Batches
These tips come from aggregate user feedback across air fryer communities and verified buyer reports. They’re the small adjustments that separate good squash from great squash.
Use a mandoline for consistent thickness. A knife works, but hand-cut slices vary by a few millimeters. Those millimeters matter at high heat. A mandoline set to 1/4-inch gives you identical slices that all finish at the same time.
Spray oil from a distance. Hold the spray bottle about 12 inches from the squash. A mist settles evenly. A blast from close range pools on the surface.
Pooled oil creates steamed spots instead of fried ones.
Season after cooking for the cooked squash. Salt draws moisture. If you season bare slices before cooking, you’re pulling water to the surface during the fry. Season after they come out, while they’re still hot.
The residual heat helps the seasoning stick.
Preheat the basket. A hot basket sears the squash on contact. A cold basket lets the squash sit and steam while it heats up. Three minutes of preheating at 375°F makes a noticeable difference in edge crispiness.
Don’t use parchment paper unless it’s perforated. Solid parchment blocks airflow to the bottom of the squash. The bottom steams while the top fries. Perforated liners are fine.
No liner at all is better.
Quick Reference: Times and Temps at a Glance
| Squash Type | Slice Thickness | Temperature | Time | Flip? |
|---|---|---|---|---|
| Yellow squash | 1/4-inch | 375°F | 10-12 min | Yes, at 5 min |
| Yellow squash | 1/2-inch | 350°F | 14-16 min | Yes, at 7 min |
| Zucchini | 1/4-inch | 375°F | 10-12 min | Yes, at 5 min |
| Zucchini | 1/2-inch | 350°F | 14-16 min | Yes, at 7 min |
| Pattypan (halved) | Whole | 375°F | 12-14 min | Yes, at 6 min |
| Breaded (any) | 1/4-inch | 375°F | 11-13 min | Use tongs for 5 min |
Start checking at the lower end of the time range. Every air fryer runs slightly differently. Visual cues are more reliable than the clock.
Frequently Asked Questions
Can I use frozen squash in the air fryer?
Frozen squash releases significantly more water than fresh. Pat it dry thoroughly before oiling. Expect a softer texture and slightly longer cook time.
The results won’t be as crispy as fresh squash, but they’re still edible.
Do I need to peel the squash before air frying?
No. Summer squash skin is tender and edible. It helps hold the slices together during cooking.
The skin also contains most of the fiber and nutrients. Leave it on.
Why did my squash burn on the outside but stay raw inside?
Your slices were too thick, or your temperature was too high. Thick slices need gentler heat to cook through. Drop the temperature to 350°F and extend the time.
Cut thicker pieces in half before cooking if possible.
Can I stack squash in the basket?
No. Stacking traps steam between layers. The bottom pieces will steam instead of being fried.
Cook in separate batches. It takes longer upfront, but saves you from mediocre results.
What’s the best oil for air fryer squash?
Avocado oil and light olive oil work well. They have high smoke points and neutral flavors. Avoid extra virgin olive oil.
It burns at air fryer temperatures and leaves a bitter taste.