Can You Make a Cake in an Air Fryer? Easy Guide
You’ve seen the viral videos. A perfectly browned cake pops out of an air fryer basket, and you think, “Can you make a cake in a air fryer?” The short answer is yes, but only if you understand how air fryers actually bake. They use intense fan‑forced convection that browns the top long before the centre sets.
Manufacturer specifications for common basket‑style air fryers (as of 2026) list maximum bake temperatures between 350°F and 400°F, and most recommend lowering the recipe temperature by 25°F. That single adjustment is the difference between a burnt crust and a tender crumb. Let’s walk through the exact conditions your cake needs to succeed.
Image source: YouTube / LeadChef HARDWARES (YouTube thumbnail (fair-use with source credit))
Quick Answer
Yes, you can bake a cake in an air fryer. The trick is to adjust temperature and time. Drop the oven temperature by 25°F.
Cut the bake time by about 20 percent. Use a pan that fits with room for rising. Silicone or small metal pans work best.
Expect a darker, crustier top than a conventional oven.
What Makes Air Fryer Baking Different (and Tricky)
Air fryers aren’t miniature ovens. They’re powerful convection heaters that blast hot air around a small enclosed basket. That’s great for crisping fries, but it creates a unique problem for cakes: the top browns fast while the inside lags behind.
The first thing you’ll notice is the colour. After just 10 minutes at 350°F, the surface of a vanilla cake can look fully done, golden, even slightly dark. But slide a toothpick in, and raw batter still clings.
That’s the convection effect in action. The fan speed in most basket‑style air fryers (typically 8, 12 feet per second) is much higher than a standard convection oven, so the heat hits the cake’s top relentlessly.
The Convection Factor: Why Cakes Bake Faster and Browner
This isn’t a flaw; it’s a feature you can work with. The intense airflow creates a better crust and a more even rise, if you manage the heat properly. According to food science research from the USDA’s baking trials, convection baking reduces overall time by 15 to 25 percent compared to still heat.
That’s why your cake may be perfectly baked in 18 minutes instead of 25.
The downside: if you don’t lower the temperature, the top will set a hard shell before the centre has a chance to cook through. That shell traps steam, which can make the inside gummy or lead to a sunken middle.
Basket vs. Oven‑Style: The First Big Decision Branch
You need to know which type of air fryer you own, because the baking technique changes. If it’s a basket style with a drawer, you have limited height and less even heat distribution to the sides. If it’s an oven style with racks, you have more vertical space and a more oven‑like environment.
- Basket style (cylindrical drawer): You can only use a pan that sits entirely inside the basket with at least 1, 2 inches of clearance above the pan rim. The heat comes mostly from the top heating element, so the top of the cake gets intense browning. You’ll need to rotate the pan manually halfway through.
- Oven style (toaster‑oven shaped): You can use standard loaf pans or round pans up to 8 inches, and the heating elements are above and below. This is much closer to a conventional oven, so you can follow regular cake recipes with only a 25°F drop and a 20% time cut.
Choose your path based on your model. If you own a basket style, keep reading for the specific adjustments. If you have an oven style, you can mostly ignore the height warnings but should still drop the temperature.
The Three Rules That Change Everything
These three rules apply to every air fryer, regardless of brand or style. Skip one, and your cake will likely fail.
Rule 1: Your Pan Has to Fit With Room to Rise
This is the most common mistake. People shove a standard 8‑inch round cake pan into a 5‑quart basket, and the batter hits the heating element during the rise. The result: a burnt top, undercooked middle, or both.
Measure your basket’s interior height. Most basket‑style air fryers have about 4.5 to 5 inches of internal clearance. A cake pan typically sits 2 to 2.5 inches tall.
That leaves 1.5 to 2 inches above the pan. That’s your rise zone. If your recipe calls for a cake that rises 1.5 inches, you’re fine.
But if the pan is taller or the batter overfills it, you’ll run into trouble.
Stick with pans no larger than 6 to 7 inches round for basket styles. For oven styles, you can go up to 8 inches. Check pan height against basket clearance before you pour batter.
Rule 2: Drop the Temperature by 25°F
This is the golden rule of air fryer baking. If your recipe says 350°F, set the air fryer to 325°F. If it says 325°F, go to 300°F.
The reason is straightforward: the concentrated convection heat cooks the outside faster, so a lower temperature gives the inside time to catch up.
Aggregate user reviews and manufacturer manuals all agree on this adjustment. If you skip it, you’ll see an overcooked top and a raw centre nearly every time. The only exception is recipes specifically designed for air fryers; those already account for the difference.
Rule 3: Watch the Clock — It’s About 20% Faster
Because the heat is more intense, your cake will finish sooner. A typical 6‑inch round cake that normally takes 25 minutes in a conventional oven will be done in roughly 18 to 20 minutes. Start checking at the 15‑minute mark.
Here’s a quick reference table for a standard box mix prepared as directed:
| Oven time (conventional 350°F) | Air fryer time (325°F) | Check at |
|---|---|---|
| 20 minutes | 14–16 minutes | 12 min |
| 25 minutes | 18–20 minutes | 15 min |
| 30 minutes | 22–24 minutes | 18 min |
| 35 minutes | 26–28 minutes | 22 min |
These times are for a 6‑inch round pan in a basket‑style air fryer. For oven styles, add 2, 3 minutes.
Which Cake Recipes Work Best in an Air Fryer
Not every cake recipe is a good candidate. The air fryer’s small cavity and intense heat favour certain types of cake over others.
Box Mixes: The Easiest Starting Point
A standard yellow, white, or chocolate cake mix is almost ideal. They’re designed to be forgiving and have a relatively low moisture content, which helps them set quickly without turning gummy. Just follow the package instructions for ingredients, then apply the temperature and time adjustments above.
Pro tip: reduce the liquid by one tablespoon per cup of mix. The air fryer’s dry heat evaporates moisture faster, and a slightly stiffer batter gives a better rise and a less dense crumb.
Scratch Cakes: Adjusting Liquid and Fat for Small Batches
From‑scratch recipes need more careful adaptation. Cakes that rely on buttermilk, sour cream, or fruit purée are riskier because the extra moisture can steam the inside while the top hardens. If you’re set on baking a scratch cake, choose a recipe with a higher fat content (butter or oil) and a lower liquid‑to‑flour ratio.
A good rule of thumb: look for a recipe with a 1:1:1 ratio of flour, sugar, and fat (by weight). Pound cake, banana bread (if you reduce the banana by half), and basic butter cakes work well. Avoid angel food or chiffon cakes, they need a tall, unconfined oven to rise, and the air fryer’s tight space will stop them.
Mug Cakes and Single‑Serve Options
These are the sweet spot for air fryer baking. A single‑serve mug cake in a 4‑ounce ramekin bakes in 8 to 10 minutes at 325°F and doesn’t face the same height constraints. Plus, you can make multiple ramekins if you have a larger basket.
The small volume cooks through evenly, and the intense browning gives a nice crust without burning.
If you want to start with the lowest risk, try a mug cake first. If you’ve already mastered a regular cake, you can also experiment with a loaf cake in an 8×4‑inch loaf pan if your oven‑style air fryer can fit it. For a successful baked potato in the air fryer, the method is similar, drop the temperature and adjust time, but cakes require more precision with pan fit.
The Right Pan for the Job
Your pan choice can make or break the cake. You need something that fits, conducts heat well, and doesn’t trap steam.
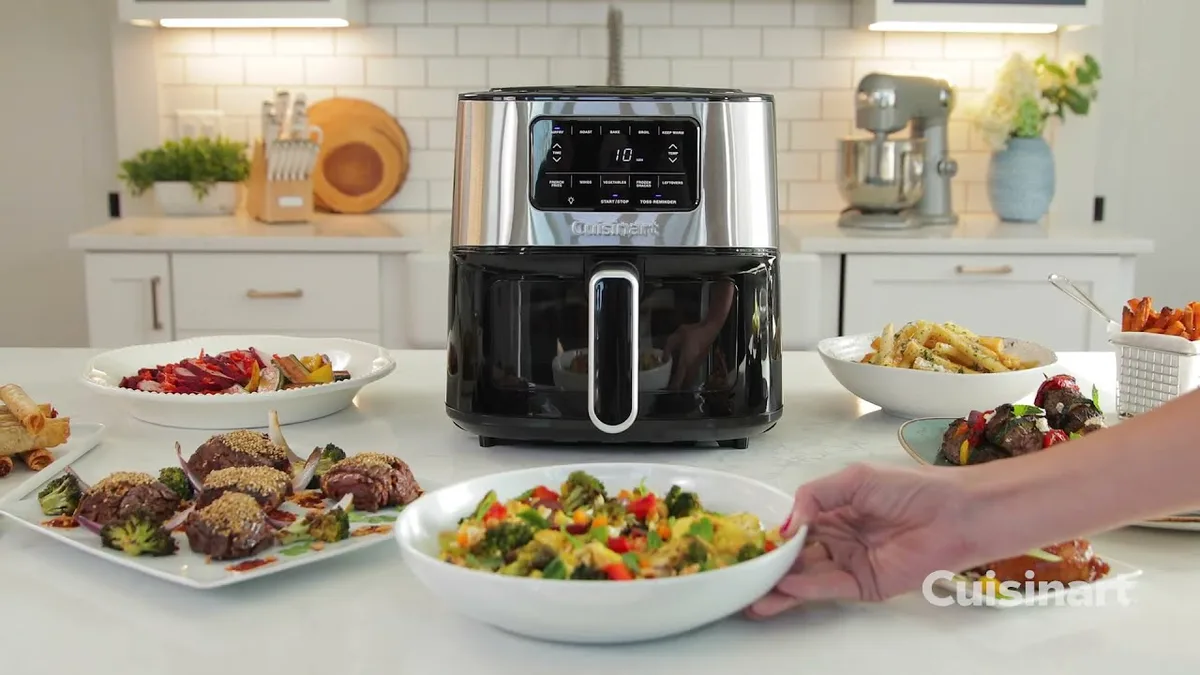
Image source: YouTube / Cuisinart (YouTube thumbnail (fair-use with source credit))
Metal vs. Silicone vs. Glass: What Handles the Heat
- Metal (aluminum or steel): Best heat conductor. Lightweight aluminum pans brown the bottom evenly. Avoid dark, non‑stick metal pans if possible, they absorb too much heat and can burn the bottom. If you only have dark pans, wrap the bottom in a layer of foil to diffuse the heat.
- Silicone: Flexible, non‑stick, and naturally heat‑resistant up to 450°F. Silicone pans are great for air fryer cakes because they don’t conduct heat as aggressively, which reduces the risk of a burnt bottom. The downside: they’re unstable when full of batter, so set them on a small metal pan or trivet inside the basket. Also, silicone doesn’t brown the bottom as much, so you get a pale underside.
- Glass or ceramic: Not recommended unless the dish is labelled oven‑safe to at least 400°F. Glass heats slowly and can cause thermal shock if placed directly under the heating element. If you must use it, preheat the air fryer empty, then place the glass dish inside when the basket is hot, but avoid sudden temperature changes.
Springform Pans: The Gold Standard for Air Fryer Cakes
A 6‑inch springform pan is the most versatile option for basket‑style air fryers. The removable ring lets you release the cake without flipping the pan, which is handy in a tight space. It also has low sides (about 2 inches), so you get the rise clearance.
Look for a non‑stick springform with a solid base (some have removable bottoms that leak batter). A 7‑inch springform fits many basket models, but measure first.
For oven‑style air fryers, an 8‑inch springform is fine.
Parchment Paper and Liners: Do’s and Don’ts
Parchment is your friend, but it needs careful placement. Cut a circle to line the bottom of the pan, that prevents sticking and makes cleanup easy. Do not line the entire inside of the basket with parchment, because it blocks airflow and can cause the cake to bake unevenly.
If you use silicone liners, make sure they are flat and not folded up the sides. Any obstructed air path around the pan will create a hot spot.
The same principle applies to other air fryer tasks: if you try to cook a steak it needs good airflow too. For the best results with a cake, keep the basket as clear as possible of loose paper.
Step-by-Step: How to Bake a Cake in an Air Fryer
Getting the process right removes most of the guesswork. Follow these steps for a basket‑style air fryer. If you have an oven style, skip the positioning notes and treat it like a regular oven, but with the temperature drop.
Prep: Batter, Pan, and Preheat
Start by preparing your cake batter as usual. For box mixes, use one tablespoon less liquid per cup of mix. For scratch recipes, confirm the batter is on the stiffer side.
Grease your pan well with butter or non‑stick spray, then line the bottom with a parchment circle. This prevents sticking and makes lifting the cake out easier.
Preheat the air fryer to the adjusted temperature. For a recipe that calls for 350°F, set it to 325°F. Let it run empty for 3 to 5 minutes.
A hot start gives better rise.
Positioning: Where to Place the Pan in the Basket
Place the pan directly on the bottom of the basket for most basket styles. Do not use the crisper tray insert; it lifts the pan too high and can block airflow.
Make sure the pan is centered. Check that there is at least 1 to 2 inches of clearance between the top of the pan and the heating element. If you cannot close the basket fully, your pan is too tall.
Use a smaller pan or a different recipe.
For oven‑style air fryers, place the pan on the middle rack. Position it centrally, away from the back heating element.
The Bake: Timing, Tent, and Doneness Test
Slide the basket in and set the timer to 80 percent of the recommended oven time. For a 25‑minute oven bake, start with 18 minutes.
At the halfway point (about 9 minutes), open the basket and tent the cake with a piece of aluminum foil. Fold the foil loosely over the top, leaving the sides open. This stops the top from over‑browning while the centre finishes cooking.
Rotate the pan 180 degrees when you tent. Basket‑style air fryers often have hot spots, and turning the pan helps even baking.
Close the basket and continue baking. Start testing for doneness at the minimum time (e.g., 15 minutes). Insert a toothpick into the centre.
If it comes out clean or with a few moist crumbs, the cake is done. If wet batter clings, bake in 2‑minute increments.
Cool and Release: Why Patience Saves Your Cake
When the cake passes the toothpick test, let it rest in the basket for 10 minutes. The intense heat makes the structure fragile, and moving it too early can cause cracking.
After 10 minutes, remove the pan from the basket. Run a thin spatula around the edge, then invert onto a cooling rack. Let it cool completely before frosting.
Air fryer cakes are more delicate when warm.
If you used a springform pan, release the ring gently, then slide the cake onto a rack.
How to Tell When It’s Done (Without Peeking Too Often)
Every time you open the air fryer basket, you lose heat and disrupt the baking cycle. So you want to check as few times as possible.
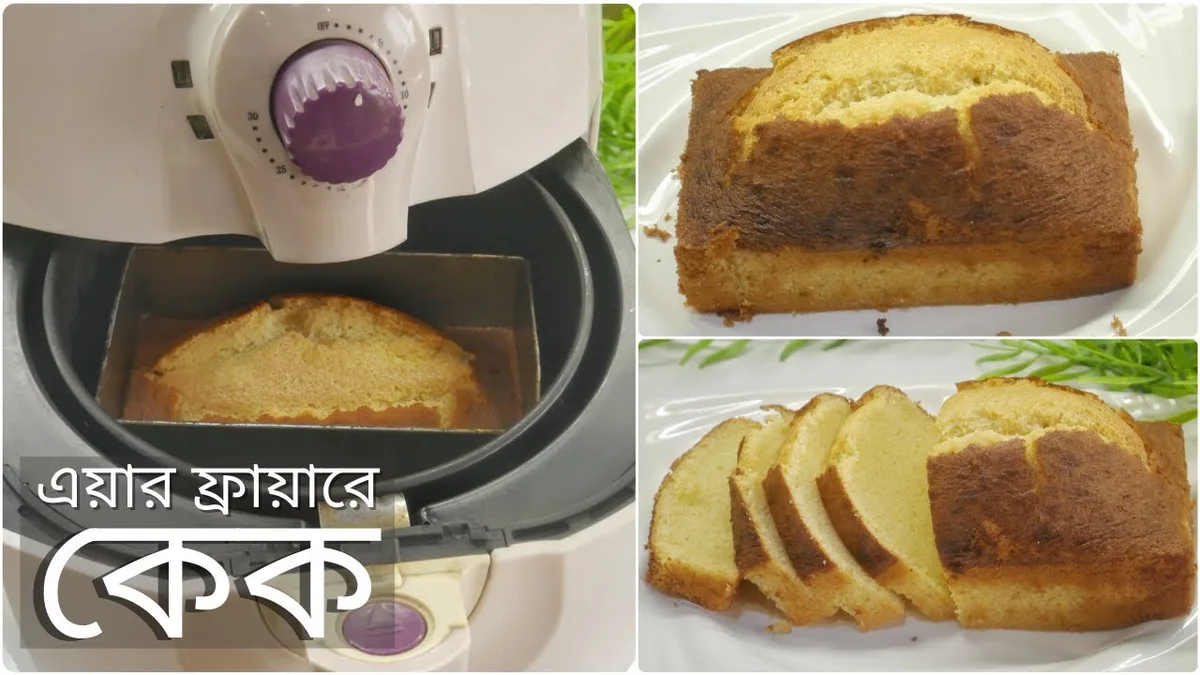
Image source: YouTube / Salma’s Kitchen (YouTube thumbnail (fair-use with source credit))
The cross‑section above shows what a fully baked air fryer cake looks like inside. The crumb is uniform, with no gummy or wet bands near the centre. The top is golden brown, but the interior colour is light and even.
Use these three cues to judge doneness without opening too often:
- Visual lift: The cake should pull away slightly from the edges of the pan. The centre should look set, not jiggly.
- Toothpick test at the earliest time: Check at 15 minutes for a 6‑inch round. If it’s clean, you’re done. If not, add 2 minutes and check again. Never add more than 2 minutes per check; the air fryer can overshoot quickly.
- Internal temperature: For egg‑based cakes, the USDA recommends an internal temperature of at least 200°F. Use an instant‑read thermometer for certainty.
The toothpick test is reliable, but an instant‑read thermometer gives a definitive answer without cutting into the cake. The centre should register 200°F to 210°F.
7 Mistakes That Ruin Air Fryer Cakes
Most air fryer cake failures come from the same handful of errors. Avoid these and your success rate jumps dramatically.
Mistake 1: Overfilling the Pan
Batter expands as it heats. In a closed air fryer basket, it has no room to escape. Fill the pan no more than two‑thirds full.
If your recipe fills the pan to the brim, make one or two mug cakes with the leftover batter instead.
Mistake 2: Skipping the Foil Tent
A foil tent is critical. Without it, the top browns into a hard shell while the inside stays raw. Tent loosely at the halfway point.
The foil reflects some heat and slows down top browning.
Mistake 3: Using the Wrong Pan Size
An 8‑inch pan looks like it fits, but it often leaves no rise space. Always measure basket height against pan height. If the pan rim is above the basket’s midpoint, switch to a smaller pan.
Mistake 4: Opening the Basket Every Two Minutes
Each opening drops the temperature by 30°F to 50°F and forces the heating element to work harder. Resist checking. Trust your timer and the toothpick test at the earliest target time.
Mistake 5: Forgetting to Grease the Pan
Air fryer cakes stick aggressively because the dry heat bakes the batter onto the pan surface. Grease thoroughly, and line the bottom with parchment. Silicone pans need no grease, but place them on a metal tray for stability.
Mistake 6: Following Oven Times Blindly
Recipes written for conventional ovens assume no forced convection. Using the same time and temperature in an air fryer guarantees a burnt top. Always drop the temperature by 25°F and reduce the time by 20 percent as a baseline.
Mistake 7: Not Letting It Cool in the Basket
The basket retains heat, and the cake finishes setting during this rest. Yanking it out immediately leads to cracks and a fragile structure. Let it sit for 10 minutes inside the basket with the power off.
The Decision Guide: Should You Bake This Cake in Your Air Fryer?
Ask yourself these three questions before pouring the batter. They form a quick decision tree that saves time and ingredients.
Decision Node 1: Does Your Cake Pan Fit With 1–2 Inches of Clearance?
Measure your basket height. If the pan rim is more than 3 inches below the heating element or the basket lid presses against the pan, do not bake. Use the conventional oven instead.
If there is enough clearance, proceed to Node 2.
Decision Node 2: Is Your Recipe Designed for Convection or Can You Adapt It?
Look at the recipe. If it includes buttermilk, fruit purée, or a high liquid ratio, consider switching to a stiffer recipe like a butter cake or pound cake. If the recipe is a standard box mix or a low‑moisture scratch cake, you can adapt it.
If you cannot reduce the liquid, bake it in the oven.
Decision Node 3: Are You Willing to Experiment on the First Try?
Your first air fryer cake will likely require a timing adjustment. If you have no spare ingredients or need guaranteed results, choose the oven. If you have flexibility and want the convenience of a quick, small cake, go ahead with the air fryer.
If you passed all three nodes, your air fryer is a good choice for this cake. If you failed Node 1 or 2, the oven is the safer route.
When to Use the Oven Instead
The air fryer is ideal for small, single‑layer cakes, mug cakes, and loaf cakes that fit with room to spare. But it has real limits.
Use the conventional oven when:
- Your cake pan is too tall. Anything over 3 inches in height risks contact with the heating element.
- You are baking a layer cake. Two stacked layers require a full oven cavity. The air fryer can bake each layer separately, but that doubles the time and risks uneven results.
- The recipe is very high‑moisture. Cheesecake, custard‑based cakes, and fresh fruit cakes steam instead of baking in the dry air fryer environment.
- You need guaranteed, consistent results for a special occasion. The air fryer adds a variable of intense top browning that is harder to control than a steady oven.
In those cases, the air fryer is not the right tool. That is fine. It excels at many other cooking tasks, from crisping wings to roasting vegetables.
If you want a quick, single‑serving cake, though, it wins every time. And if you are already using it for other foods like a perfectly cooked steak, the same convection speed applies, but cakes need the gentler hand described here.
Frequently Asked Questions
Can I use a glass or ceramic dish in an air fryer?
Only if the dish is labelled oven‑safe to at least 400°F. Preheat the empty basket first, then place the glass dish inside to avoid thermal shock. Even then, glass heats unevenly, so metal or silicone is safer.
Do I need to flip the cake halfway through?
Yes, for basket‑style air fryers. Rotate the pan 180 degrees at the halfway mark. This compensates for uneven heat distribution.
Oven‑style models usually don’t need rotation.
Why is my air fryer cake dry on the outside and raw in the middle?
The temperature was too high and the top browned before the centre set. Drop the temperature by another 10°F next time and tent with foil earlier. Also check that your pan has enough clearance for air circulation.
Can I bake a boxed cake mix straight from the box without adjustments?
Yes, but you must adjust temperature and time. Lower the temperature by 25°F and reduce the bake time by about 20 percent. Also reduce liquid by one tablespoon per cup of mix.
What’s the best temperature for a vanilla cake?
325°F is the sweet spot for most vanilla cakes in basket‑style air fryers. For oven‑style, 325°F also works, but you can go to 340°F if you keep a close eye on browning.
Final Verdict: Yes, With These Conditions
You can absolutely make a cake in an air fryer. The result is a well‑browned, tender cake that bakes in about two‑thirds the time of a conventional oven. But it only works if you respect the conditions: the right pan size, a 25°F temperature drop, a foil tent halfway through, and a willingness to check early.
If you follow the decision guide and the three core rules, your air fryer becomes a genuinely useful baking tool. It won’t replace your oven for layered birthday cakes or large batches. For small, quick, single‑layer cakes, though, it’s hard to beat the speed and convenience.