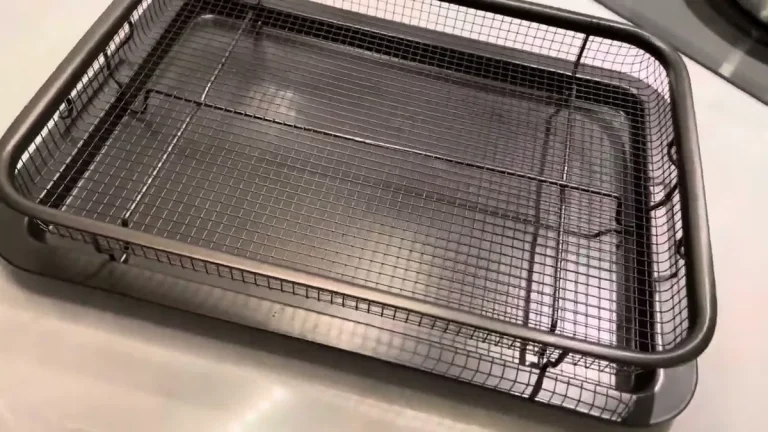

Everything About How to Clean an Air Fryer
So your air fryer has been working hard for weeks. Maybe months. And now you're staring at a greasy basket with bits of last week's chicken stuck to the crisper tray, wondering if you've already done permanent damage.
Learning how to clean an air fryer properly isn't complicated, but it's surprisingly easy to mess up. One wrong move with a steel wool pad or a splash of cold water on a hot heating element and you're shopping for a replacement. The good news is that with the right approach, you can keep yours running like new for years.
Manufacturer specifications across major brands indicate that proper cleaning after every three to five uses extends the lifespan of a standard air fryer by two to three times compared to units that get only occasional attention. As of 2026, most consumer models still use nonstick coatings that are more delicate than you'd think. Let's walk through exactly what to do based on your specific situation.
Quick Answer
Unplug the air fryer. Let it cool for 15 to 30 minutes. Remove the basket and crisper tray.
Wash them in warm soapy water with a soft sponge. Never submerge the main unit. Wipe the heating element with a damp cloth.
Dry everything completely before reassembling. That's the short version.
The longer version depends on how dirty your air fryer actually is.
Decision Tree: Find Your Cleaning Path Based on Your Situation
Not every air fryer needs the same cleaning routine. The method changes depending on what you cooked, how long ago you cooked it, and whether you've noticed smoke or smells. Here's how to figure out which path you're on.
Branch 1: Daily Light Use (No Burned-On Food)
If you just cooked something that didn't leave a mess fries, frozen chicken tenders, vegetables with minimal oil you're in the easiest category. Pull the basket and crisper tray out. Rinse them under hot water.
Use a soft sponge with a drop of dish soap. Wipe them dry with a microfiber cloth. Wipe the interior walls and heating element with a barely damp cloth.
Total time: about 90 seconds.
This is the routine that keeps an air fryer fresh without any heavy lifting. If you do this after every use, you'll rarely need a deep clean. For quick weekday meals like reheating leftovers or cooking frozen snacks, this daily reset handles the job fine.
Branch 2: Heavy Grease or Smoked Recently
Has your air fryer started smoking during cooking? That's a sign of grease buildup on the heating element. This branch needs more attention.
Remove the basket and soak it in hot soapy water for 15 minutes. While it soaks, focus on the heating element. Let the unit cool completely.
Take a damp microfiber cloth and gently wipe the exposed coils. Don't scrub hard. The goal is to remove surface grease, not to polish the element.
If the element has visible charred buildup, use a toothpick or wooden skewer to gently dislodge the crusted bits. Be careful not to push debris into the fan housing. Wipe again with a fresh damp cloth.
Rinse and dry the basket thoroughly before reassembling.
Branch 3: Burnt-On, Stuck-On Food Residue
This is the situation that frustrates most people. You cooked something saucy or sugary and it baked onto the basket like concrete. Don't reach for the scrubber.
Soak the basket and tray in hot water with a generous squirt of dish soap for 30 minutes. If that doesn't loosen things, make a paste with baking soda and water about three parts baking soda to one part water and spread it over the stuck areas. Let it sit for 15 to 20 minutes.
Then scrub gently with a soft sponge.
For really stubborn spots, you can let the paste sit overnight. The alkalinity of the baking soda breaks down the carbonized food without damaging the nonstick coating. Rinse thoroughly and dry completely.
Branch 4: Weird Smells That Won't Go Away
Fish, garlic, and spicy seasonings can leave lingering odors in the porous nonstick coating. Start with the baking soda paste method on the basket and tray. For the interior, wipe down the walls and heating element with a mix of equal parts white vinegar and water.
If the smell persists after washing, try the sun-drying trick: leave the basket and tray in direct sunlight for a few hours. UV light helps break down odor-causing compounds.
If the smell is coming from the unit itself rather than the removable parts you may have food debris trapped behind the heating element or in the fan housing. That requires a more careful disassembly approach covered in the deep clean steps later.
Branch 5: First-Time Deep Clean Before Using
You just got a new air fryer or you're using one that's been sitting in storage. Give it a light once-over before you cook anything. Wash the basket and crisper tray with warm soapy water.
Wipe the interior with a damp cloth to remove any dust or manufacturing residue. Run the air fryer empty at 400°F for five minutes to burn off any residual oils from production. Let it cool, then wipe again.
This step is quick but it makes a real difference in first-use flavor.
What You'll Need: The Right Tools and the Wrong Ones
Using the wrong cleaning tool is the fastest way to ruin an air fryer. The nonstick coating on most consumer models is surprisingly fragile. Here's what belongs in your cleaning kit and what doesn't.
| Safe Tools | What to Avoid |
|---|---|
| Soft sponge (non-abrasive side) | Steel wool or metal scrubbers |
| Microfiber cloth | Scotch-Brite pads or abrasive sponges |
| Soft-bristle bottle brush | Wire brushes |
| Toothpick or wooden skewer | Metal utensils or knives |
| Baking soda (mild abrasive paste) | Harsh oven cleaners |
| White vinegar (diluted) | Bleach or ammonia |
| Dish soap (mild, degreasing) | Dishwasher detergent (can be too harsh for hand washing) |
Why the coating matters. Most air fryer baskets use either PTFE-based nonstick coatings or ceramic coatings. Both are vulnerable to scratching. Once scratched, the coating can peel or flake into your food.
The FDA considers nonstick coatings safe when intact, but scratched surfaces can release particles you don't want in your meals.
When vinegar works. White vinegar is excellent for cutting grease and neutralizing odors. But avoid using it on aluminum parts, especially older air fryer models that may have exposed aluminum in the basket or tray. Vinegar can react with aluminum and cause pitting.
Stick to mild dish soap for aluminum surfaces.
Step-by-Step Cleaning: Basket-Style Air Fryers
Basket-style air fryers are the most common type. The cleaning process is straightforward once you know the order of operations.
Unplug and Cool Down
This isn't negotiable. Unplug the air fryer from the wall outlet before you do anything else. Then wait 15 to 30 minutes for the unit to cool completely.
The heating element and surrounding metal stay hot far longer than you'd expect. Touching them too soon is a burn risk. Pouring cold water into a hot basket can warp the metal or crack the nonstick coating.
Remove and Soak the Basket and Crisper Tray
Slide the basket out of the main unit. Remove the crisper tray from inside the basket. Fill your sink with hot water and add a squirt of dish soap.
Submerge both pieces. Let them soak for 15 minutes for light residue or 30 minutes for stuck-on food.
For the crisper tray specifically, look at the small holes and slots. Food gets trapped there easily. A soft bottle brush works well for cleaning these out after the soak loosens everything.
Clean the Heating Element Without Breaking It
This is the step most people skip, and it's the one that matters most for preventing smoke. The heating element is located at the top of the cooking chamber. It's usually an exposed coil or a covered heating rod.
Let it cool completely. Take a barely damp microfiber cloth and gently wipe the surface. Don't press hard.
If there's visible buildup, use a toothpick to carefully scrape off the charred bits. Wipe again with the cloth.
Never spray water or cleaning solution directly onto the heating element. The moisture can drip into the electronics below. Always apply liquid to your cloth first, not to the appliance.
Wipe the Fan Vent and Interior Walls
The fan vent is typically on the back wall or the side wall of the cooking chamber. Use a soft brush or a dry microfiber cloth to remove dust and food particles from the vent grille. If the vent is clogged, the air fryer can't circulate heat properly and your food won't cook evenly.
For the interior walls, a damp cloth followed by a dry cloth is all you need. Don't use soap on the interior walls unless there's visible grease splatter. If you do need soap, apply it to the cloth, not directly to the walls, and wipe thoroughly with a damp cloth afterward to remove any soap residue.
Dry and Reassemble Correctly
This is where people rush and create problems. Water trapped between the basket and the main unit can cause rust or electrical issues over time. Dry every piece thoroughly with a microfiber cloth.
Let the basket and tray air dry for another 10 to 15 minutes if possible before reassembling.
Slide the dry basket back into the main unit. Make sure it clicks or locks into place properly. Plug the unit back in.
You're ready to cook again. For more detailed guidance on cooking techniques that minimize mess, our guide on getting juicy results with bratwurst includes tips on avoiding grease splatter.
Step-by-Step Cleaning: Oven-Style Air Fryers
Oven-style air fryers are a different beast entirely. Instead of a pull-out basket, you get a glass door, wire racks, and heating elements at the top and bottom. The cleaning process changes because more parts are exposed and more surfaces collect grease.
Why Oven-Style Is Different
The biggest difference is the heating element layout. Basket-style units have one element at the top. Oven-style models have elements above and below, plus a convection fan on the back wall.
The glass door interior gets splattered with grease that bakes on over time. The crumb tray sits at the bottom and catches drips, but it doesn't catch everything.
You also cannot submerge any part of the main unit. Oven-style air fryers have electronics behind the control panel and along the sides. Water intrusion is a real risk.
Removing Racks, Crumb Tray, and Door If Possible
Start by unplugging the unit. Let it cool for 20 to 30 minutes. Pull out the wire racks and the crumb tray.
Some oven-style models have removable glass doors. Check your manual. If the door comes off, remove it carefully and set it aside.
If it doesn't, you'll clean it in place.
Wash the racks and crumb tray in warm soapy water with a soft sponge. For baked-on grease on the racks, soak them in hot water with dish soap for 20 minutes. Use a soft brush to clean between the wires.
Cleaning Around the Convection Fan
The convection fan is usually behind a metal grille on the back wall. Grease vaporizes during cooking and condenses on the fan blades. Over time, this creates a sticky buildup that reduces airflow and can cause smoking.
Use a soft brush or a dry microfiber cloth to clean the fan grille. If you can access the blades through the grille slots, gently wipe them with a cloth wrapped around a thin spatula or a chopstick. Don't force anything.
The fan motor is delicate. If the buildup is heavy, a toothpick can help dislodge the crust without damaging the blades.
Dealing with Grease Splatter on the Interior Glass
The interior glass door is where grease splatter shows most clearly. Spray a small amount of white vinegar onto a microfiber cloth, not directly onto the glass. Wipe the interior surface in circular motions.
For heavy buildup, let the vinegar sit on the glass for a few minutes before wiping.
Do not use glass cleaner or oven cleaner on the interior. The chemicals can leave residues that transfer to your food during the next cook cycle. Vinegar and water are sufficient.
Dry the glass with a clean cloth to prevent streaks.
Reassembly and Testing
Dry all racks and the crumb tray completely before putting them back. Slide the racks into their slots. Insert the crumb tray.
Reattach the door if you removed it. Plug the unit in and run it empty at 400°F for five minutes to burn off any moisture. This step also helps you confirm that no water got into the fan or heating elements before you cook again.
Common Mistakes That Ruin Your Air Fryer
Cleaning mistakes are the number one reason air fryers end up in the trash before their time. Here are the most common ones and how to avoid them.
Putting Hot Parts in Cold Water
This is the fastest way to warp a basket or crack a nonstick coating. Thermal shock happens when hot metal hits cold water. The sudden temperature change causes the material to contract unevenly.
Once warped, the basket won't sit flat in the unit. The crisper tray may rock back and forth. Replacement parts aren't always available for every model.
Always let the basket and tray cool to room temperature before washing. If you're in a hurry, run them under warm water first, then gradually cool the water temperature.
Submerging the Main Unit
The main unit contains the motor, heating element, control board, and wiring. Water and electronics don't mix. Submerging the base can cause short circuits, corrosion, or complete failure.
Even a small amount of water dripping into the fan housing can cause strange noises or intermittent operation.
Only the removable basket, crisper tray, racks, and crumb tray should touch water. Everything else gets wiped with a damp cloth.
Using Too Much Soap
More soap doesn't mean a cleaner air fryer. Excessive dish soap leaves a residue that bakes onto the basket during the next use. That residue can alter the taste of your food.
It can also create a sticky film that attracts more food particles.
Use a drop of dish soap per basket. Rinse thoroughly. If you see bubbles after rinsing, you didn't rinse enough.
Run the basket under hot water until the water runs clear and no suds remain.
Scrubbing the Nonstick Coating
Nonstick coatings are designed to release food, not to withstand abrasive cleaning. Scrubbers, steel wool, and harsh sponges scratch the surface immediately. Once scratched, the coating degrades faster.
It can peel, flake, or bubble.
Use only soft sponges or microfiber cloths on nonstick surfaces. If food is stuck, soak it. If soaking doesn't work, use the baking soda paste method.
Never scrape with metal utensils or scrub pads.
Dishwasher Mistakes
Many air fryer baskets are labeled dishwasher safe. That doesn't mean the dishwasher is good for them. Dishwasher detergents are more alkaline than hand soap, and the high heat can accelerate coating breakdown.
Aggregate user reviews indicate that baskets washed in the dishwasher tend to show signs of wear six to twelve months sooner than hand-washed baskets.
If you must use the dishwasher, place the basket on the top rack only. Skip the heated dry cycle. Remove the basket immediately after the cycle ends and dry it by hand.
For your crisper tray and racks, hand washing is safer.
How to Remove Burnt-On Grease Without Scrubbing
Burnt-on grease is the toughest cleaning challenge. The good news is that you don't need to scrub it off. Chemistry does the work.
Baking Soda Paste Method
Mix three parts baking soda with one part water. You want a thick paste, not a runny liquid. Spread the paste over the burnt areas on the basket or tray.
Let it sit for 15 to 20 minutes. The baking soda breaks down the carbonized grease chemically.
After the paste has sat, rinse it off with warm water. Use a soft sponge to gently wipe away the loosened residue. Most of it should come off with minimal pressure.
For heavy buildup, apply a fresh layer of paste and let it sit for another 20 minutes.
Vinegar Steam Trick for Heating Elements
For grease on the heating element, you can use steam to soften it. Mix equal parts white vinegar and water in a heat-safe bowl. Place the bowl in the air fryer basket after you've removed the crisper tray.
Run the air fryer at 300°F for five to eight minutes. The steam from the heating vinegar loosens the grease on the element.
Let the unit cool completely. Then wipe the heating element with a damp microfiber cloth. The grease should come off easily.
Never pour vinegar directly onto the heating element. The steam method is safe because the liquid never contacts the electronics.
When to Let It Soak Overnight
Some residues are stubborn enough to need an overnight soak. This is common after cooking sugary glazes, honey coatings, or barbecue sauces. If the baking soda paste doesn't work after two applications, leave a fresh layer of paste on the affected areas overnight.
Cover the basket with plastic wrap to keep the paste from drying out. In the morning, rinse and wipe. The extended contact time allows the baking soda to fully break down the carbonized layer.
This method works on both baskets and crisper trays.
Getting Rid of Stubborn Odors
Lingering smells are a common complaint among air fryer owners. Fish, garlic, and spicy seasonings leave behind volatile compounds that absorb into the nonstick coating. Here's how to neutralize them.
Why Certain Smells Linger
The nonstick coating is porous at a microscopic level. Food odors get trapped in these tiny pores. Heat from the next cooking cycle releases the trapped compounds, and your food picks up the old flavors.
This is especially noticeable with fish and garlic.
The solution is to break down the odor compounds rather than just masking them with scents.
Lemon and Vinegar Solution for Deodorizing
Mix two tablespoons of white vinegar with one cup of water. Add the juice of half a lemon. Wipe the interior walls and heating element with this solution using a microfiber cloth.
Let it sit for five minutes. Then wipe with a clean damp cloth to remove any vinegar residue.
For the basket and tray, soak them in a solution of warm water, vinegar, and lemon juice for 30 minutes. Rinse thoroughly and dry.
Baking Soda Soak for Baskets
Baking soda is a natural odor absorber. Fill your sink with warm water. Add half a cup of baking soda.
Submerge the basket and crisper tray. Let them soak for one to two hours. The baking soda pulls odor molecules out of the nonstick coating.
After soaking, wash the pieces with mild dish soap and warm water. Dry completely. The smell should be significantly reduced or gone entirely.
Sun-Drying Trick for Lingering Smells
UV light from direct sunlight breaks down organic compounds including the ones responsible for stubborn odors. After washing and drying the basket and tray, place them in direct sunlight for two to three hours. This works especially well for fish odors that seem impossible to remove.
If you don't have direct sunlight available, place the basket near a bright window. The UV exposure through glass is less effective but still helps over several hours.
How Often Should You Really Clean It?
Frequency matters more than intensity. A quick clean after every few uses prevents the buildup that forces you into deep-cleaning territory. Here's a realistic schedule based on how often you cook.
After Each Use (Minimum 30 Seconds)
This isn't a full clean. It's a reset. Remove the basket and crisper tray.
Rinse them under hot water. Wipe the interior with a dry paper towel to catch crumbs and loose grease. That's it.
This step prevents yesterday's crumbs from burning onto the heating element during today's cook. For lighter meals like roasted vegetables or frozen snacks, this quick reset is often enough. If you're cooking something delicate that could leave residue on the basket, you might want to check out our guide on handling squash in the air fryer for tips on minimizing cleanup.
After 3 to 5 Uses (Light Clean)
This is the standard maintenance window. Wash the basket and crisper tray with warm soapy water. Wipe the interior walls and heating element with a damp cloth.
Dry everything thoroughly. This takes about five minutes. If you follow this schedule, you'll rarely need to deal with burnt-on grease or lingering smells.
Weekly (Heavy Deep Clean)
If you use your air fryer daily, do a full deep clean once a week. Soak the basket and tray. Clean the heating element.
Wipe the fan vent. Check the crumb tray on oven-style models. This takes about 15 minutes.
The payoff is consistent performance and no surprise smoke during cooking.
Monthly (Full Disassembly If Possible)
Once a month, do a complete inspection. Remove every removable part. Check for grease buildup behind the heating element.
Clean the fan blades if accessible. Look for rust or coating damage on the basket. This is also a good time to check that the rubber feet and gaskets are intact.
A monthly deep clean keeps your air fryer running like new and helps you catch minor issues before they become major repairs.
Quick Maintenance Checklist (For People Who Just Want to Get It Done)
Not everyone wants to read paragraphs about cleaning schedules. Here's the stripped-down version.
1-Minute Daily Reset
Pull the basket. Rinse it. Wipe the interior with a dry paper towel.
Done.
5-Minute Weekly Refresh
Wash the basket and tray with soap and water. Wipe the heating element. Dry everything.
Reassemble. Done.
15-Minute Monthly Deep Clean
Soak the basket and tray in hot soapy water for 15 minutes. Make a baking soda paste for any stuck-on spots. Wipe the heating element and fan vent.
Clean the glass door on oven-style models. Dry every piece. Run the unit empty at 400°F for five minutes to confirm everything is dry and functioning.
Done.
This checklist covers 95 percent of what you need to do. The remaining five percent involves troubleshooting specific problems like persistent odors or visible smoke.
When to Replace Parts vs. When to Replace the Whole Unit
Not every problem requires a new air fryer. Some parts are replaceable. Knowing the difference saves you money and keeps a good unit out of a landfill.
Nonstick Coating Peeling (Replace the Basket)
Peeling nonstick coating is the most common reason people think they need a new air fryer. In most cases, you only need a new basket. Check the manufacturer's website or the user manual for replacement basket availability.
Many brands sell baskets separately for $15 to $35. If you're also noticing that your basket no longer releases food well even after cleaning, it may be time for a new one. Our guide on making meatloaf in the air fryer includes tips on avoiding messy cleanup that extends basket life.
Heating Element Damage (Warranty or Replace)
If the heating element is visibly damaged or doesn't glow evenly during operation, the issue is internal. Heating elements are rarely sold as standalone replacement parts for consumer air fryers. Check your warranty first.
Most units come with a one to two year warranty that covers electrical components. If the warranty has expired, the cost of repair often exceeds the cost of a new unit.
Fan Making Noise (Clean First, Then Evaluate)
A noisy fan is usually clogged, not broken. The buildup of grease and dust on the fan blades throws off the balance. Clean the fan blades and housing thoroughly.
If the noise disappears, you're fine. If the noise persists or the fan wobbles visibly, the fan bearing may be worn out. That's typically a replacement scenario.
Rust on Tray or Basket (Replace Immediately)
Rust on any food-contact surface is a health risk. The iron oxide can flake off into your food. Replace the affected part immediately.
If the rust is on the main unit housing, that's cosmetic. But rust inside the cooking chamber or on the basket means the coating has failed and moisture has reached the metal underneath. Don't cook with it until you've replaced the part.