What Is How Do I Cook a Pizza in an Air Fryer
So you've got an air fryer, and you're staring at a pizza wondering if it's possible. Good news: it absolutely is, and the results can actually beat your full-size oven.
Figuring out how do I cook a pizza in an air fryer comes down to one thing: matching your method to the type of pizza you have. A frozen personal pan pizza behaves completely differently than a leftover slice or a fresh dough base. Get that distinction right, and you're 90% of the way there.
Manufacturer specifications across major air fryer brands show a consistent temperature sweet spot between 360°F and 400°F (182°C to 204°C). Cooking times range from 3 minutes for reheated slices to roughly 12 minutes for a fully frozen pizza, depending on thickness and size. As of 2026, most basket-style air fryers cap out at 400°F, which is high enough for a proper crispy crust.
Understanding those limits up front will save you from charred cheese and doughy centers.
Let's break down exactly how to nail it every time.

Image source: Web (Bing) / cycookery.com (Web image (fair-use with source credit))
The Only Question That Matters: What Kind of Pizza Are We Cooking?
Before you touch a single button, identify what's in front of you. This single decision determines everything else: temperature, time, and technique.
Frozen pizza needs the most aggressive approach. It's starting from a fully raw state, so it requires enough heat and time to thaw, cook the dough through, melt the cheese, and crisp the bottom. If you treat it like a leftover, you'll end up with a cold center and a burnt top.
Fresh dough pizza (store-bought dough, pre-made crusts, naan, or pita) needs a gentler touch. The dough is already at room temperature or slightly chilled, so it cooks much faster than frozen. You'll want a slightly lower temperature to avoid burning the cheese before the crust sets.
Leftover pizza slices are the easiest win. You're just reheating, not cooking. The goal is to restore crispness without drying out the toppings or turning the cheese into rubber.
That takes a shorter time at a moderate temperature.
Here's the quick comparison:
| Pizza Type | Best Temperature | Approximate Time | Key Challenge |
|---|---|---|---|
| Frozen personal | 380°F (193°C) | 10-12 minutes | Ensuring the center thaws completely |
| Fresh dough base | 360°F (182°C) | 7-9 minutes | Cooking the crust before cheese burns |
| Leftover slice | 350°F (177°C) | 3-4 minutes | Crisping without drying out |
Why Your Air Fryer Model Changes the Answer
Your specific air fryer isn't just a detail. It's a variable.
Basket-style air fryers (the most common type) circulate hot air in a small enclosed chamber. Heat comes from above, and a powerful fan pushes it down and around. The basket diameter typically ranges from 3.5 to 6 quarts, which translates to a usable cooking surface of about 7 to 9 inches.
That means a standard personal pizza fits, but just barely. The tight space is actually an advantage for crispiness, but it also means you need to watch for the pizza floating if it's lightweight.
Oven-style air fryers (toaster oven form factors) have horizontal racks and larger internal volumes. They can handle 9 to 12-inch pizzas comfortably. However, the fan is often less powerful and positioned differently, which can lead to uneven browning if you're not careful.
The flip side is that you have more surface area, so you're not limited to personal sizes.
For the rest of this guide, we'll use the decision tree approach: identify your pizza type and your air fryer model, then follow the branch that matches. It sounds more complicated than it is. Once you understand why the settings differ, you'll adapt naturally to any machine you're working with.
The most common mistake across aggregate reviews is using a one-size-fits-all time and temperature. People burn one frozen pizza, then assume the same setting applies to everything else. That's how you ruin a perfectly good fresh dough base.
Instead, we'll walk through each scenario systematically.
Quick Answer: The 30-Second Version
Here's the short version if you're in a hurry.
For frozen personal pizza: Preheat your air fryer to 380°F (193°C). Cook for 10 to 12 minutes. Check the center is hot and the cheese is bubbling.
For fresh dough pizza: Preheat to 360°F (182°C). Cook for 7 to 9 minutes. The crust should be golden brown and the bottom firm.
For leftover slices: No preheat needed. Set to 350°F (177°C) and cook for 3 to 4 minutes. The cheese should melt without running.
The universal tip: Place a small piece of parchment paper under the pizza to catch drips and prevent sticking. Make sure it's rated for high heat, typically up to 420°F or 450°F.
The safety check: Use an instant-read thermometer to confirm the internal temperature of any meat toppings reaches 165°F (74°C). That's the USDA food safety guideline, and it applies no matter what cooking method you're using.
The Size Check: Will It Even Fit?
This is the first real obstacle people hit, and it's worth solving before you even turn on the machine.
Measure your air fryer basket or rack interior. Not the exterior dimensions, the actual cooking surface. For a basket-style air fryer, that's the diameter of the wire mesh bottom.
Most fall between 7 and 9 inches. Oven-style models typically offer a square or rectangular rack that's around 9 by 9 inches or larger.
If you have a standard 7-inch personal pizza: It will fit in nearly any basket-style air fryer without issue. Drop it in, and you're done.
If your pizza is 9 inches or larger: Check whether your basket can accommodate it. Some 5.8-quart models have a wider footprint that handles 9-inch pizzas. Others don't.
Measure it. Don't guess. A pizza that touches the sides or gets wedged against the heating element will burn on the edges and stay raw in the middle.
If it doesn't fit: You have two options. Cut the pizza into sections, or use a smaller pizza. For frozen pizzas, you can cut through them while frozen with a sharp chef's knife, but it takes a bit of force.
For leftovers, slicing is trivial. For fresh dough, trim it before you add toppings, and reuse the scraps as breadsticks or garlic knots.
The general rule across user feedback: if the pizza is more than half an inch larger than your basket on any side, cut it. Forcing it in never ends well.
Step-by-Step: Frozen Personal Pizza in a Basket-Style Air Fryer
This is the most common scenario, so let's start here.
Step 1: Preheat your air fryer. Set it to 380°F (193°C) and let it run for 2 to 3 minutes. A quick preheating routine makes a noticeable difference in how evenly the crust cooks. Skip this, and your pizza will spend the first few minutes just getting the chamber up to temperature.
Step 2: Unwrap the pizza. Remove all plastic packaging. If there's a cardboard tray, take it out. Cardboard in an air fryer is a fire hazard, plain and simple.
Step 3: Check the fit. Place the pizza in the basket. If it fits with at least half an inch of clearance on all sides, great. If not, cut it into wedges or squares.
Step 4: Address the floating problem. Here's the issue nobody warns you about. Frozen personal pizzas are light. The high-speed convection fan can literally lift them off the bottom, flapping them around and pressing them against the heating element.
The fix is simple: place a small trivet or a few toothpicks pushed through the pizza into the basket grate to hold it down. Or, use a perforated pizza pan insert if your air fryer came with one.
Step 5: Cook for 8 minutes. Start on the lower end. After 8 minutes, open the basket and check. The cheese should be melting, and the edges should just start browning.
Step 6: Check the center. The biggest risk with frozen pizza is a cold middle. Probe the center with an instant-read thermometer. You're looking for at least 165°F (74°C), though you'll typically see 170°F to 180°F when it's done right.
Step 7: Finish and rest. If the crust needs more color, add 1 to 2 minutes. Once it's done, pull it out and let it rest for 2 minutes. This allows the cheese to set so it doesn't slide off when you cut it.
The total time runs 10 to 12 minutes depending on your specific machine's wattage and how cold your freezer is. Higher wattage air fryers (1700W and above) will cook faster than lower wattage models (1200W to 1500W).
Step-by-Step: Fresh Dough Pizza in an Air Fryer
Fresh dough changes the game. It's more forgiving in some ways, but it demands a different approach.
If you're using a pre-made base (naan, pita bread, or a store-bought pizza crust), you're looking at the fastest pizza you'll ever make. These bases are already cooked or partially cooked, so you're really just melting cheese and heating toppings. Set your air fryer to 360°F (182°C) and cook for 5 to 7 minutes.
The base will crisp up beautifully without drying out.
If you're working with raw dough (homemade or store-bought ball), there's more involved.
Step 1: Prepare your dough. Roll or stretch it to about 6 to 7 inches in diameter. Keep it thin, around a quarter-inch thick or less. Thicker dough won't cook through in the time it takes the cheese to melt properly.
Step 2: Dock the dough. Poke it several times with a fork. This prevents large air bubbles from forming and pushing the toppings around. It's the same technique bread bakers have used for centuries.
Step 3: Give the crust a head start. This is the pro move. Blind bake the bare dough at 360°F for 3 to 4 minutes before adding any toppings. This sets the bottom and prevents the soggy-center problem that plagues air fryer pizza.
Then add your sauce and toppings.
Step 4: Layer toppings correctly. Sauce first, a light layer of cheese, then any meat or veggie toppings. More cheese on top if you like it extra cheesy. Keep it restrained.
Overloaded pizza doesn't cook evenly in the tight space of an air fryer basket. Think toppings in a single layer.
Step 5: Cook for 5 to 6 minutes. At 360°F, you want the cheese to melt fully and start browning at the edges. The bottom should be firm and crispy to the touch.
Step 6: Verify doneness. Check the bottom of the crust. It should be golden brown, not pale and doughy. If the cheese is done but the crust needs more time, flip the pizza over and cook it crust-side up for another minute.
It sounds odd, but it works.
Fresh dough pizzas are the most customizable option. You control the sauce, the cheese, the toppings, and the thickness. The tradeoff is more prep work.
But if you're in the mood for a pizza that tastes like it came from a real pizzeria, this is the way to get there.
Step-by-Step: Reheating Leftover Slices (The Most Common Use)
This is the scenario people use most, and it's also the hardest to mess up. The goal isn't cooking. It's restoring texture.
Step 1: Skip the preheat. A preheat isn't strictly necessary for reheating. The pizza is already fully cooked, so you're just warming it through. Set the air fryer to 350°F (177°C) and add 1 to 2 minutes to the total time while it comes up to temp.
Step 2: Place the slice in the basket. If you have multiple slices, lay them in a single layer. Overlapping blocks airflow and creates soggy spots. If you only have one slice, center it.
If you have two, arrange them like a fan without touching.
Step 3: Cook for 3 to 4 minutes. Start with 3 minutes. Check the cheese. If it's melted and the crust has firmed up, you're done.
If the cheese needs more time, add 30-second bursts. The crust will crisp up quickly, so don't walk away.
Step 4: Watch for the gluey cheese trap. Reheated cheese can turn rubbery if it sits too long. The sweet spot is just as the cheese starts to bubble, not before, not after. Pull the slice the moment the cheese looks glossy.
Step 5: Rest for one minute. This lets the cheese set so it doesn't drag off the slice when you pick it up. It also cools the crust enough to bite into without burning your mouth.
For thick crust slices, like deep dish or Sicilian, add a minute. For thin crust, cut the time to 2 to 3 minutes. The difference is dough density, and it's worth remembering if you're reheating a mix of styles.
Step-by-Step: Air Fryer Oven Models (The 9-12 Inch Game)
Oven-style air fryers change the math significantly. You get more space, but the fan works differently.
The good news: You can fit larger pizzas. A 9 to 12-inch pizza sits comfortably on the rack. That solves the size problem from basket models almost entirely.
The tradeoff: Heat comes from above and below, but the horizontal layout means less aggressive hot air circulation. The crust browns differently, and the top sometimes lags behind the bottom.
Step 1: Use the rack, not the tray. The perforated rack lets hot air reach the bottom of the crust. The solid baking tray traps steam and makes the base soggy. If your model only has a tray, flip it upside down as a makeshift rack.
Step 2: Preheat properly. Oven-style models take longer to heat up, around 3 to 5 minutes. A proper preheat is more critical here. Without it, the cooking time stretches out, and the crust dries before the cheese melts.
Step 3: Adjust your temperature down. Drop the temp by 10 to 15°F compared to a basket model. So for frozen pizza, use 365°F to 370°F instead of 380°F. The larger chamber means heat distributes over more surface area, but it also means less intense direct heat.
Step 4: Rotate halfway through. Fan placement matters. One side of the oven might run hotter than the other. Rotate the pizza 180 degrees at the halfway point for even browning.
This is a small habit that saves you from a burnt edge on one side and a pale crust on the other.
Step 5: Use the "bake then crisp" technique. Start with the bake setting if your oven has one, or a lower temp, to cook the toppings through. Then switch to the air fry setting for the last 2 minutes to crisp the bottom. This two-phase approach mimics a deck oven and delivers a noticeably better crust.
Oven-style models aren't better or worse, just different. You get more flexibility with pizza size, but you trade some of the intense crispness that basket models are known for. If you own one, lean into the larger capacity and adjust times accordingly.
Most recipes you find online are written for basket models, so add 20 to 30% more time when using an oven-style unit.
Mistakes That Ruin Air Fryer Pizza (And How to Dodge Them)
You've got the basics down. Now let's talk about what actually goes wrong, so you can avoid the most common pitfalls.
The cheese blow-off. The fan is strong enough to lift cheese straight off the pizza. It's a surprisingly common issue, especially with lightweight frozen pizzas. The fix is simple: keep the pizza weighed down with a trivet or toothpicks, and don't pre-grate your own cheese too finely.
Pre-shredded cheese has an anti-caking coating that helps it stay put.
The soggy center. This happens when the dough doesn't cook through before the cheese finishes. The fix is a longer cook time at a slightly lower temperature, or blind baking the fresh dough first, which we covered earlier. Moisture is the enemy, so avoid overloading with watery vegetables like fresh tomatoes or mushrooms without pre-cooking them.
The smoke alarm moment. Grease drips from pepperoni or sausage and hits the hot heating element. It smokes, it smells, and it sets off alarms. The fix is a piece of parchment paper under the pizza to catch drips, or using a lighter topping load.
If you're cooking meat-heavy pizzas regularly, this becomes second nature. And it's connected to why proper cleaning matters, which we'll get to shortly.
The burnt edges. The edges of the pizza are thinner than the center, so they brown faster. With high heat, they can burn before the middle is done. The fix is rotating the pizza halfway through and checking early.
Every air fryer runs slightly differently in temperature, so some experimentation is normal.
What Thaws Faster: Pre-Cooking vs Direct Cooking
A common question is whether you should thaw a frozen pizza before air frying it. The answer is no, and here's why.
Cooking from frozen is fine. The air fryer handles it well, provided you extend the time. The frozen state actually helps the crust hold its shape. Thawing first makes the dough soft, which increases the chance of it sticking to the basket or folding under heat.
Don't microwave it first. Some recipes suggest a quick microwave zap to thaw the center. Don't do it. The microwave creates steam, which turns the crust soft and dense.
You'll lose the crispiness that air frying is meant to deliver.
What about fresh dough? For fresh dough, slightly chilled is fine. It's easier to stretch when it's cool, and it holds its shape better in the basket. Room temperature is also fine, but the dough might bubble unevenly.
Cold dough doesn't need a thaw period, just a few extra minutes of cooking time.
The exception: If you're using a thick frozen pizza with lots of toppings, you might consider a longer cook at a lower temperature instead of any pre-thaw. The air fryer's convection heat will still cook it through, it just takes patience.
The Temperature and Time Cheat Sheet
Here's the reference guide you'll actually use. Bookmark this section or screenshot it for quick access.
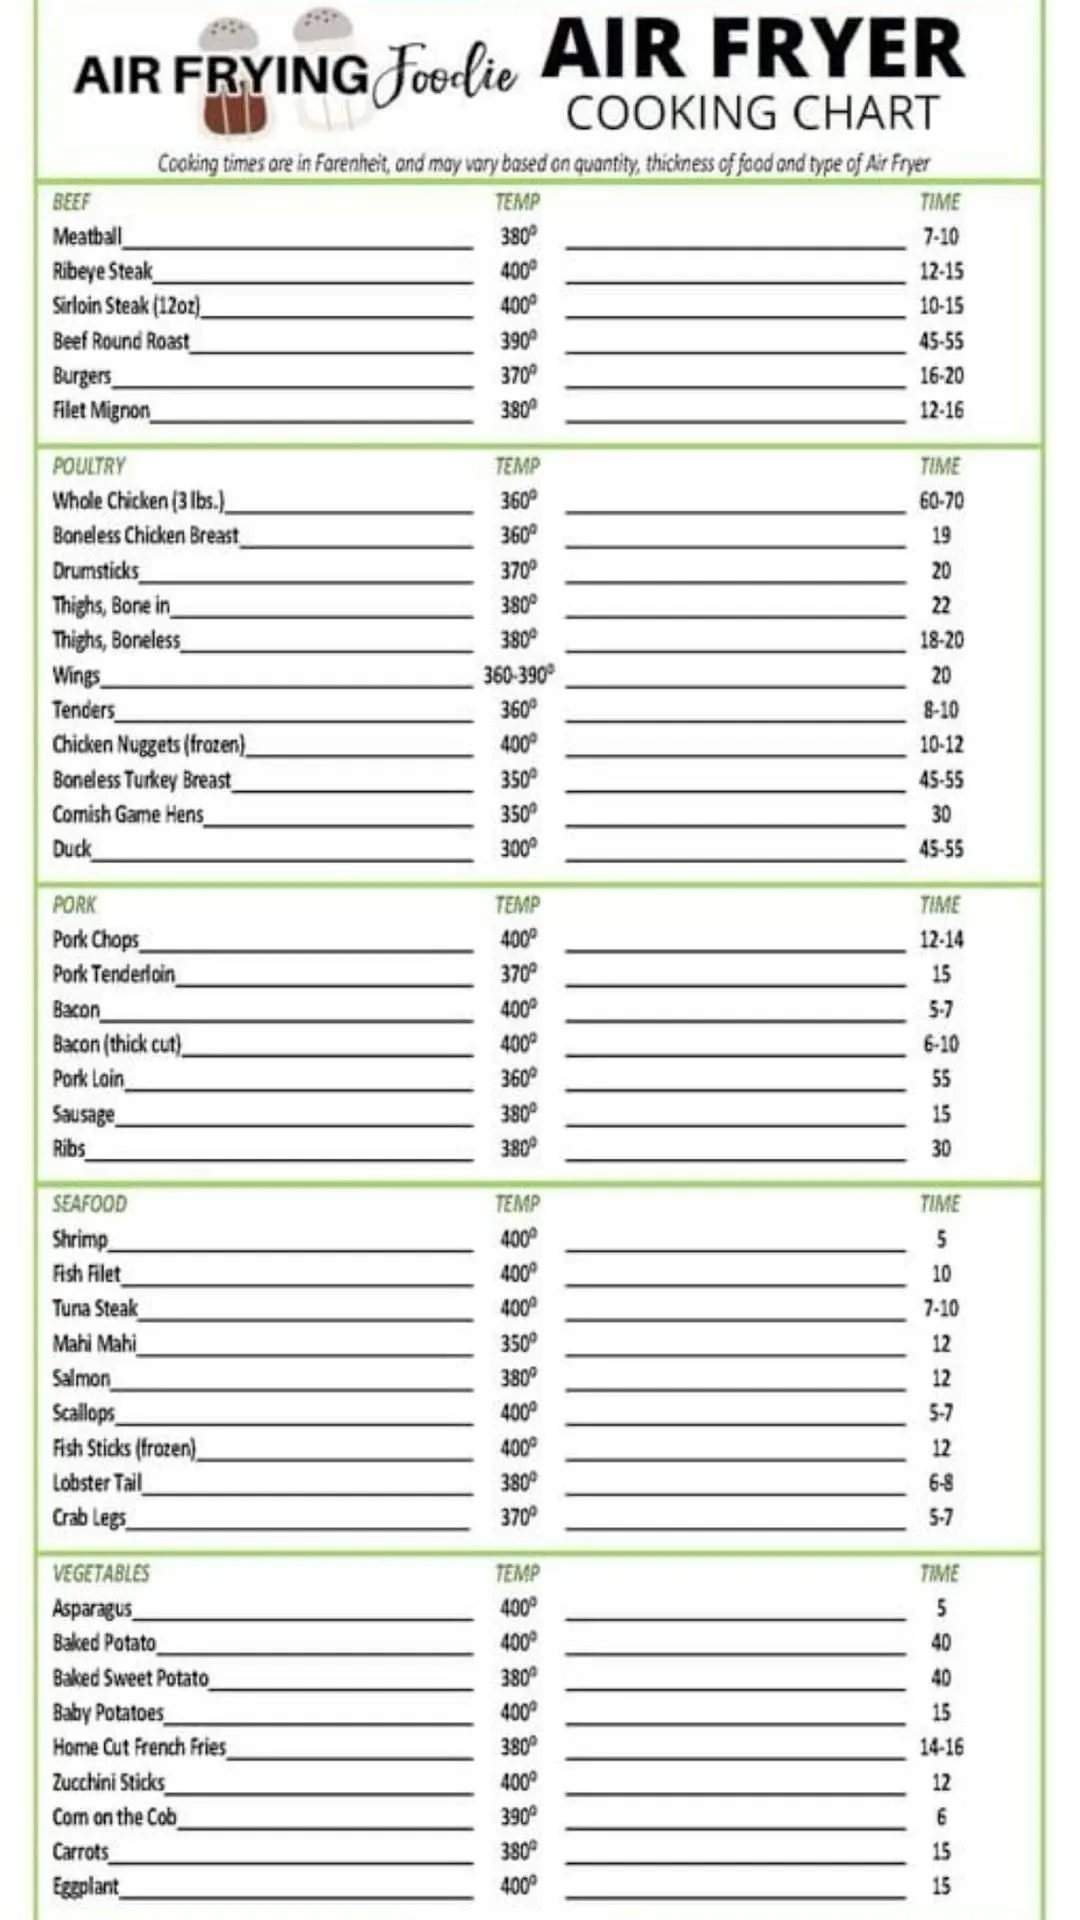
Image source: Web (Bing) / artofit.org (Web image (fair-use with source credit))
| Pizza Type | Basket Model | Oven-Style Model | Temp | Time (Minutes) |
|---|---|---|---|---|
| Frozen personal (5-7 inch) | Yes | Yes | 380°F (193°C) | 10-12 |
| Fresh dough base (7 inch) | Yes | Yes | 360°F (182°C) | 7-9 |
| Pre-made crust (naan/pita) | Yes | Yes | 360°F (182°C) | 5-7 |
| Leftover slice (thin crust) | Yes | Yes | 350°F (177°C) | 2-3 |
| Leftover slice (thick crust) | Yes | Yes | 350°F (177°C) | 3-4 |
| Frozen 9-12 inch | Check fit | Yes | 370°F (188°C) | 12-15 |
The core principle: These are starting points, not rules. Your specific air fryer might run hot or cold. Get an instant-read thermometer.
Check the center of the pizza hits 165°F (74°C) for food safety.
One more note: The larger the pizza, the more it benefits from a longer cook at a lower temp. A 12-inch frozen pizza at 360°F will cook more evenly than at 400°F. The edges won't scorch while the center thaws.
Air Fryer vs the Alternatives: When It's Actually the Right Tool
Honestly, the air fryer isn't always the best choice. It depends on what you're trying to achieve.
For reheating leftovers: The air fryer wins every time. It restores crispness better than a microwave and faster than a conventional oven. The microwave steams the crust, the oven takes 15 minutes to preheat.
For cooking a full-size pizza: The conventional oven wins. A 12-inch or 14-inch pizza simply doesn't fit in most basket-style air fryers. Even oven-style models struggle with larger pies without cutting them into sections.
For personal pizzas and quick meals: The air fryer is the clear winner. It preheats in minutes, uses less energy, and delivers a crispier crust than a full-size oven. This is where the air fryer shines.
For fresh dough pizza: The air fryer produces surprisingly good results, but you're limited on size. A skilled pizzaiolo will still prefer a hot stone in a conventional oven.
The "Too Big to Fry" Problem: Handling 12-Inch Pizzas
If your pizza exceeds your air fryer's capacity, don't give up. There are two workarounds.
Cut it into quadrants. Slice the pizza into four equal sections. Cook each quadrant separately. It's not as elegant as a whole pizza, but it works perfectly with your existing technique.
Each slice takes 3 to 5 minutes depending on the toppings.
Use a larger oven-style model. If you own an air fryer toaster oven, check whether the rack accommodates the full pizza. Many do. If not, you're back to quartering it.
How to Clean Up the Greasy Mess (Without Ruining Your Machine)
Pizza leaves grease. It's unavoidable. Cleaning your air fryer properly after each use extends its lifespan and prevents smoke.
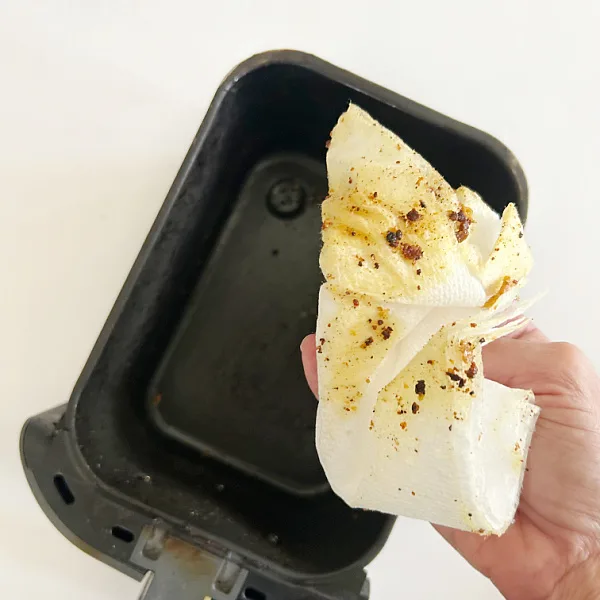
Image source: Web (Bing) / lemonslavenderandlaundry.com (Web image (fair-use with source credit))
Let the basket cool completely. Hot metal and cold water cause warping. Wait 10 to 15 minutes after cooking.
Wash with warm soapy water. The basket is usually dishwasher-safe, but hand washing is gentler on the non-stick coating. Check your manufacturer's manual. If you're unsure, check whether your basket is dishwasher-safe.
For baked-on grease: Soak the basket in hot water with a few drops of dish soap for 15 minutes. Then scrub with a soft sponge. Avoid abrasive scrubbers, they scratch the coating.
For stubborn residue, follow a deeper cleaning routine. Regular cleanup after each use is the easiest way to avoid heavy scrubbing sessions.
Don't forget the heating element. Grease splatters up, not just down. If you notice smoke, grease has built up on the element. Carefully clean the heating element once a month.
Always unplug the machine first and never use wet cloths on electrical components. For a full breakdown, see how to clean a very dirty air fryer.
Frequently Asked Questions
These are the questions people ask most often.
Can I put a pizza box in the air fryer?
No. Cardboard is a fire hazard in an air fryer. The heating element gets hot enough to ignite it.
Always remove the pizza from its packaging.
What if my air fryer only goes to 350°F?
You can still make pizza, just with longer times. Add 2 to 3 minutes to the recommended cooking times. The lower temperature won't crisp the crust quite as well, but the results are still solid.
Is it cheaper than using the oven?
Yes. Air fryers use less energy than conventional ovens because they heat a smaller chamber. Running a convection oven for 20 minutes costs roughly three to four times more than air frying.
For single servings, the savings add up.
Should I preheat before adding pizza?
Yes. A preheating step gives you more consistent results. The extra 2 to 3 minutes is worth it.
Check out how to preheat your air fryer properly for exact times and temps.
Can I cook two pizzas at the same time in an oven-style air fryer?
Often, yes. If your model has multiple racks, you can cook two 7-inch pizzas simultaneously. Rotate them halfway through for even browning.
Cooking two 9-inch pizzas in a single layer rarely works due to airflow limitations.
Why is my pizza sticking to the basket?
The dough melts into the gaps in the wire mesh as it cooks. Parchment paper solves this. Cut a piece slightly smaller than the pizza and place it underneath.
Just make sure it's rated for high temperatures.
The Final Verdict: The 60-Second Decision Guide
Here's the entire process boiled down to quick decisions.
- Frozen personal pizza? Preheat to 380°F. Cook 10-12 minutes. Use parchment paper or a trivet to prevent floating.
- Fresh dough base? Preheat to 360°F. Blind bake the crust for 3 minutes first. Then add toppings and cook 5-6 minutes.
- Leftover slice? No preheat needed. Cook at 350°F for 3-4 minutes. Pull it the moment the cheese bubbles.
- Too big to fit? Cut it into quadrants and cook in batches.
- Anything with meat? Check the internal temperature hits 165°F (74°C) per USDA food safety guidelines.
That's it. The air fryer will never replace a wood-fired pizza oven, but it doesn't need to. It's fast, it's convenient, and it produces a genuinely crispy crust.
Once you understand the timing for your specific pizza type and machine, you'll get consistent results every single time.