Step-by-step: How Do I Cook Tater Tots in the Air Fryer
You're staring at a bag of frozen tater tots, and the air fryer is sitting right there on the counter. You've heard the hype. You've seen the crispy golden photos.
But when you tried it yourself, you got pale, floppy tots that tasted more like steamed potatoes than crunchy nuggets of joy. So, how do I cook tater tots in the air fryer and actually get them right?
The answer isn't complicated, but it does require a bit of technique. Most people fail because they treat the air fryer like a mini oven and just "set it and forget it." That's the wrong approach. As of 2026, the standard recommendation across manufacturer specs and user communities is 400°F for 12 to 14 minutes, with a mandatory shake halfway through.
But that's just the starting point. Let's dig into the details that separate perfect tots from sad, soggy disappointments.
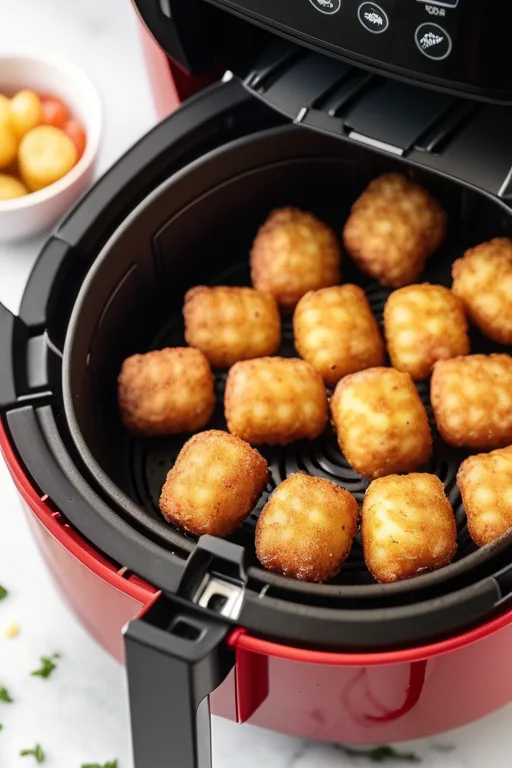
Image source: Bing (Web (fair-use with source credit))
The Real Problem: Soggy, Uneven Tater Tots (And Why It Happens)
Let's talk about why your first batch didn't turn out. It's almost never the tots' fault. It's the method.
The science here is pretty straightforward. Frozen tater tots are essentially par-cooked potato shreds held together with a bit of starch and coated in oil. When you cook them, you're trying to achieve two things at once: drive moisture out of the interior while crisping up that outer shell.
The air fryer's rapid air circulation does this remarkably well, but only if the hot air can actually reach every surface.
When you pile a full bag of tots into the basket, you create a problem. The tots on top get blasted with hot air, but the ones in the middle are essentially steaming in their own released moisture. That trapped moisture softens the exterior before it has a chance to crisp.
The result? A batch of tots where some are golden and crunchy, but most are pale and floppy.
Another culprit is skipping the preheat. A cold air fryer starts the cooking process at a lower temperature, which means the tots spend the first few minutes just warming up rather than crisping. That extended time allows more moisture to escape from the center and condense on the surface, working against that crunchy shell you're after.
We also need to talk about shaking. This is the step that home cooks skip more than any other. The hot air in a basket-style fryer comes from above, blowing down across the basket.
The tots on top brown first. If you never rotate them, the ones sitting against the basket floor stay pale and soft.
So the "real problem" is rarely a bad air fryer or subpar tots. It's a lack of airflow, moisture management, and proper rotation. Fix those three things, and you've solved 90% of the crispiness battle.
Quick Answer
Cook frozen tater tots at 400°F for 12 to 14 minutes in an air fryer. Toss them with a teaspoon of neutral oil first. Shake the basket at the 8-minute mark.
Cook in a single layer. Spray with cooking spray for extra crunch.
Understanding Your Air Fryer: Basket vs. Toaster Oven Style
Before you even open the freezer door, you need to know which type of air fryer you own. This single detail changes your cooking time, technique, and expectations.
Basket-style air fryers are the most common. They look like a small, rounded appliance with a pull-out drawer or basket. The heating element and fan sit at the top, blowing hot air downward.
These models have aggressive airflow that crisps food quickly. Most basket fryers range from 1500 to 1800 watts, which means they run hot and fast.
Toaster oven-style air fryers look like a traditional countertop toaster oven but with a convection fan and a dedicated "air fry" setting. They have a heating element at the top and a fan that circulates heat, but the airflow is gentler than a basket model. They also have a larger cooking chamber, which means the heat has more space to fill.
The result is longer cook times and a slightly different texture.
| Feature | Basket-Style | Toaster Oven-Style |
|---|---|---|
| Airflow | Aggressive, direct | Gentle, indirect |
| Preheat Time | 2-3 minutes | 3-5 minutes |
| Typical Cook Time | 12-14 minutes | 15-20 minutes |
| Capacity | 2-8 quarts | 4-12 quarts |
| Crispiness | High | Medium-High |
| Batch Size | Smaller batches | Larger batches |
If you own a basket model, the method below will work perfectly. If you have a toaster oven style, you'll need to adjust your expectations and your timing. We'll cover both in detail.
It's also worth checking whether your specific model has a preheat function. Some newer air fryers offer a one-touch preheat button, while older models require you to run the unit empty for a few minutes manually. If you're unsure, check your manual.
The right way to preheat makes a bigger difference than you might think.
The Basket-Style Method: Step-by-Step for Maximum Crisp
This is the method I recommend to anyone who owns a standard basket-style air fryer. It's reliable, repeatable, and produces tots that rival anything from a deep fryer.
Step 1: Preheat to 400°F
Turn your air fryer to 400°F (200°C) and let it run empty for 2 to 3 minutes. If your model has a preheat setting, use it. If not, just set the temperature and start the timer, then cancel it once the time is up.
The goal is to have a hot chamber ready to receive your tots.
Step 2: Toss the Tots in a Little Oil
You might think frozen tots already have enough oil, and technically they do. But a light extra coating helps the exterior crisp up faster and more evenly. Grab a bowl and add your frozen tots.
Drizzle with about a teaspoon of neutral oil, like avocado or canola oil. Toss until every tot has a thin, glossy coat. A pinch of salt at this stage doesn't hurt either.
Step 3: Load the Basket in a Single Layer
This is non-negotiable. Place the tots in the air fryer basket in a single layer. If that means cooking in two batches, so be it.
Overcrowding will steam your tots, and all that oil you just added will work against you. Space between tots is what allows the hot air to wrap around each one and create that shatteringly crisp exterior.
Step 4: Cook for 8 Minutes
Set your timer for 8 minutes and let the air fryer do its work. Don't open the basket during this time. Opening it releases heat and resets the cooking environment.
Trust the process.
Step 5: Shake the Basket
This is the most important step. Pull the basket out and give it a vigorous shake. You want to flip the tots and rotate their position in the basket.
The ones on the bottom need to move to the top, and vice versa. If shaking seems too aggressive, use a silicone spatula to gently turn them. The goal is even browning on all sides.
Step 6: Cook for Another 4 to 6 Minutes
Put the basket back in and continue cooking. Start checking at the 4-minute mark. You're looking for a deep golden-brown color.
Some people prefer their tots darker and extra crunchy, which is totally valid. If that's you, add an extra minute or two. Just watch them carefully, because they can go from golden to burnt very quickly in these last few minutes.
Step 7: Serve Immediately
Tater tots are at their peak the moment they come out of the air fryer. They lose crispiness quickly as they sit. Serve them hot, straight from the basket, with your favorite dipping sauces.
The Toaster Oven-Style Method: Adjusting for Slower Airflow
If you own a toaster oven-style air fryer, the steps are similar but the timing needs adjustment. The gentler airflow means food takes longer to crisp, and you might need a little extra help to get that crunchy shell.
Step 1: Preheat and Use the Air Fry Setting
Set your toaster oven to 400°F (200°C) using the air fry or convection setting. Preheat for 3 to 5 minutes. These units take longer to come to temperature because they're heating a larger chamber.
Step 2: Oil, Then Load the Tray
Same as before, toss your frozen tots with a teaspoon of neutral oil. Arrange them on the air fryer tray or rack in a single layer. Make sure they're not touching, or at least not stacked.
The airflow is weaker, so spacing matters even more.
Step 3: Cook for 10 Minutes
Set your timer for 10 minutes. Because these units circulate air less aggressively, the initial cooking phase takes longer.
Step 4: Shake or Flip the Tots
Pull the tray out and use a spatula to flip and turn the tots. A tray doesn't shake like a basket, so you'll have to do this manually. Try to get each tot flipped to a new side.
Step 5: Cook for Another 5 to 10 Minutes
Check your tots at the 5-minute mark. They'll likely need more time. Keep an eye on the color.
The final cook time will depend on your specific unit, so be patient and keep checking.
The Extra Layer of Protection
Because toaster oven air fryers struggle more with crispiness, you have a few extra tools at your disposal. A light spray of cooking oil halfway through can help. So can placing the tots on a wire rack rather than a solid sheet pan, which allows air to circulate underneath.
If you're still getting soft results, consider bumping the temperature to 425°F for the final few minutes.
The trade-off is time, but the results can still be excellent. You just need to adjust your expectations and give the tots a little more attention.